ge profile washing machine manual

The GE Profile Washing Machine offers advanced features, energy efficiency, and reliable performance, making it a top choice for modern laundry needs․ This manual provides essential guidance for optimal use and maintenance․

1․1 Overview of the GE Profile Series

The GE Profile Series represents a line of high-performance washing machines designed to deliver efficient and reliable laundry solutions․ Known for their advanced features and sleek designs, these appliances are tailored to meet modern household needs․ The series includes models like the GE Profile PTW600BPRDG, PTW700BSTWS, and PTW700BPTDG, each offering unique capabilities such as large capacities, smart technology integration, and energy-saving modes․ These machines are built with durable materials, including stainless steel baskets, ensuring long-lasting performance․ The GE Profile Series is also recognized for its user-friendly interfaces and customizable wash cycles, making it a preferred choice for homeowners seeking convenience and superior cleaning results․ This overview highlights the key attributes that make the GE Profile Series a standout in the market․

1․2 Key Features of the GE Profile Washing Machine

The GE Profile Washing Machine is equipped with innovative features designed to enhance laundry efficiency and user convenience․ It boasts a spacious interior with capacities ranging up to 5․4 cubic feet, accommodating bulky items and large loads effortlessly․ Energy efficiency is a hallmark, with models featuring Eco Mode to reduce water and energy consumption․ Smart technology integration allows for seamless connectivity to smartphones, enabling remote monitoring and control․ Additionally, the machine operates quietly, thanks to its advanced silent operation design․ Certain models, such as the PTW700BSTWS and PTW700BPTDG, include specialized cycles like sanitize and steam cleaning for deeper hygiene․ These features collectively ensure a superior laundry experience, blending performance, sustainability, and modern convenience․

1․3 Importance of the User Manual

The user manual is an essential resource for understanding and utilizing the GE Profile Washing Machine effectively․ It provides detailed instructions on installation, operation, and maintenance, ensuring optimal performance and longevity․ The manual includes safety guidelines, troubleshooting tips, and explanations of advanced features like Eco Mode and Smart Technology․ By following the manual, users can avoid common errors, maintain efficiency, and resolve issues independently․ It also serves as a reference for warranty information and customer support contacts․ Regularly reviewing the manual helps users stay informed about best practices, ensuring their appliance operates safely and efficiently․ This guide is indispensable for both new and experienced users, offering comprehensive insights to maximize the machine’s capabilities and extend its lifespan․

Installation and Setup

Proper installation ensures safe and efficient operation․ Follow the manual’s instructions for electrical and plumbing connections, and ensure the machine is level and securely positioned to avoid damage․

2․1 Pre-Installation Requirements

Before installing your GE Profile washing machine, ensure the installation area meets specific requirements․ Choose a level, stable surface to prevent vibration and imbalance during operation․ Ensure proper ventilation to avoid moisture buildup․ Check that electrical and water supply connections are compatible with the machine’s specifications․ The area should be clear of flammable materials and provide easy access for maintenance․ Ensure the drain system is properly installed and capable of handling the washer’s discharge․ Refer to the manual for detailed specifications and guidelines to ensure a safe and successful installation process․

2․2 Step-by-Step Installation Guide

Follow the installation manual carefully to ensure proper setup of your GE Profile washing machine․ Begin by positioning the washer on a level, stable surface to prevent vibration․ Next, connect the water supply lines to the machine, ensuring they are securely attached to avoid leaks․ Plug the power cord into a grounded electrical outlet, adhering to the voltage requirements specified in the manual․ Install the drain hose correctly, ensuring it is not kinked or blocked․ After connecting all components, run a test cycle to check for leaks or improper installation․ Refer to the manual for detailed diagrams and specific instructions tailored to your model․ Proper installation ensures safe and efficient operation of the washer․

2․3 Electrical and Plumbing Connections

Ensure the GE Profile washing machine is connected to a dedicated 120V, 60Hz electrical circuit to prevent power issues․ Use a grounded outlet and avoid extension cords for safety․ For plumbing, connect the water supply lines to the machine’s inlet valves, using stainless steel or reinforced hoses to prevent leaks․ The water pressure should be between 20 and 120 PSI․ Install the drain hose securely, ensuring it does not exceed 8 feet in height to avoid siphoning․ Check all connections for leaks before operating the washer․ Refer to the manual for specific fitting sizes and configurations․ Proper electrical and plumbing connections are crucial for safe and efficient operation of the appliance․

Operating the Washing Machine

Understand the control panel functions, select appropriate wash cycles, and load laundry following guidelines․ Start the machine, ensuring balanced loads and correct detergent use for optimal performance․

3․1 Understanding the Control Panel

The GE Profile washing machine features an intuitive control panel designed for easy navigation․ It includes options for selecting wash cycles, adjusting temperature settings, and enabling advanced features like steam cleaning or sanitize modes․ The panel also displays diagnostic messages and cycle progress․ Familiarizing yourself with each button and its function ensures efficient operation․ For detailed explanations, refer to the manual, which outlines each control’s purpose and operation․ Proper use of the control panel enhances cleaning performance and extends the machine’s longevity․ Always ensure the panel is clean and free from debris to maintain responsiveness and functionality․

3․2 Selecting the Right Wash Cycle

Selecting the appropriate wash cycle on your GE Profile washing machine ensures optimal cleaning and fabric care․ The machine offers various cycles, including delicate, normal, heavy-duty, and sanitize options․ For lightly soiled items, a gentle cycle is ideal, while heavily soiled or bulky items require a more robust setting․ The sanitize cycle uses high heat to eliminate bacteria, perfect for bedding or towels․ Always match the cycle to the fabric type and soil level for best results․ Refer to your user manual for detailed descriptions of each cycle and their recommended uses․ Proper cycle selection enhances cleaning efficiency and protects your garments from damage․

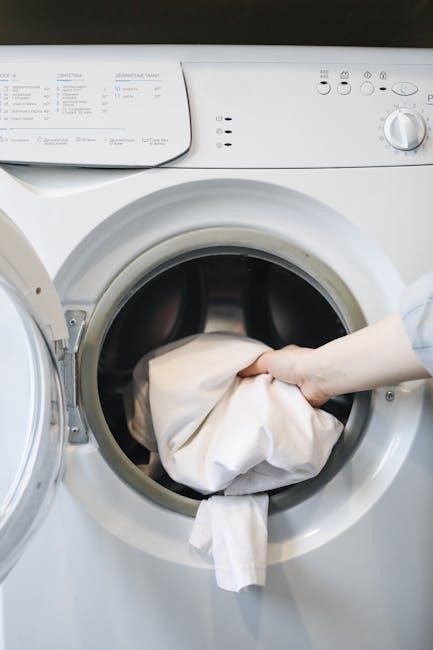
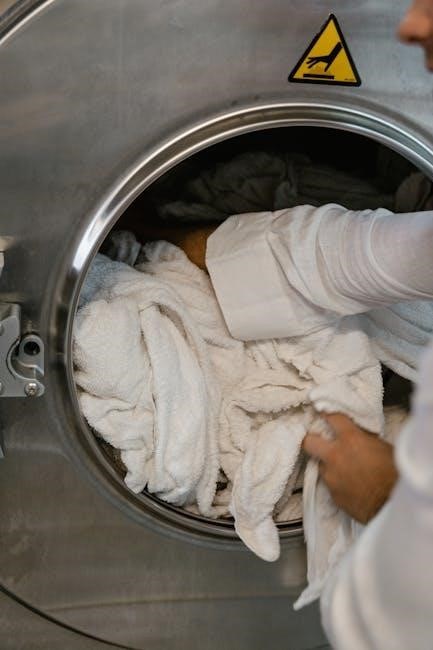
3․3 Loading Laundry: Best Practices

Properly loading your GE Profile washing machine ensures efficient cleaning and prevents damage to both the machine and your clothes․ Avoid overloading the drum, as this can reduce cleaning performance and cause mechanical strain․ Separate delicate fabrics from heavier items and use mesh laundry bags for fragile garments․ Distribute clothes evenly to maintain balance during cycles․ Leave enough space for water to flow freely, ensuring all items are washed thoroughly․ For bulky items like blankets, use the designated heavy-duty cycle․ Never overload the machine beyond its capacity, as indicated in the manual․ This ensures optimal performance and extends the lifespan of your washer․

Maintenance and Care

Regular maintenance ensures optimal performance․ Clean the washer filter, check drain hoses, and leave the lid open to dry․ Follow manual guidelines for longevity and efficiency․

4․1 Cleaning the Washer Filter

Cleaning the washer filter is essential for maintaining your GE Profile Washing Machine’s efficiency․ Locate the filter at the bottom right corner․ Open the access door using a flat tool․ Unscrew the housing slowly to avoid water spillage․ Remove and rinse the filter under running water to eliminate debris․ Regular cleaning prevents lint buildup and ensures smooth operation․ After cleaning, reinstall the filter securely and close the door․ This simple process helps maintain performance and prevents potential issues․ Always refer to the manual for specific instructions tailored to your model․

4․2 Routine Maintenance Tips

Routine maintenance is key to ensuring your GE Profile Washing Machine operates efficiently and lasts longer․ Regularly check and clean the washer filter to prevent lint and debris buildup․ Inspect the drainage system for blockages and ensure proper water flow․ Run a cleaning cycle with a washer cleaner or vinegar solution to remove detergent residue and odors․ Always leave the lid open after use to allow the interior to dry, preventing mildew․ Check the gasket and seals for wear or mold and clean them periodically․ For specific maintenance recommendations, refer to your model’s manual․ These simple practices help maintain optimal performance and prevent common issues․

4․3 Troubleshooting Common Issues

Identify and resolve common issues with your GE Profile Washing Machine by checking error codes in the manual․ If the machine vibrates excessively, ensure it’s level and balanced․ For unusual noises, inspect for loose items or debris in the drum․ If the washer won’t start, verify power supply and check the lid switch․ Low water pressure or kinked hoses can cause fill issues․ Regularly clean the filter to prevent clogs․ If problems persist, reset the machine by unplugging it for 30 seconds․ Refer to the troubleshooting section in your manual for model-specific solutions․ Addressing these issues promptly ensures optimal performance and extends the machine’s lifespan․

Advanced Features

The GE Profile Washing Machine features Eco Mode for energy efficiency, Smart Technology for app-controlled cycles, and Silent Operation for quiet performance, enhancing convenience and functionality․

5․1 Eco Mode and Energy Efficiency

The GE Profile Washing Machine features an Eco Mode designed to optimize energy and water usage․ This mode adjusts water temperature and cycle length to deliver efficient cleaning while reducing utility bills․ With ENERGY STAR certification, the machine meets strict energy efficiency standards, ensuring eco-friendly performance․ Eco Mode is ideal for everyday loads, providing a balance between cleaning power and resource conservation․ By utilizing advanced sensors and smart technology, the washer minimizes energy consumption without compromising wash quality․ This feature not only helps protect the environment but also lowers operational costs, making it a practical choice for eco-conscious households․ The Eco Mode is seamlessly integrated into the control panel, allowing users to easily activate it for greener laundry routines․

5․2 Smart Technology Integration

The GE Profile Washing Machine integrates advanced smart technology for enhanced convenience and control․ With Wi-Fi connectivity, users can manage laundry tasks remotely using the GE Appliances app․ This feature allows you to start, stop, or monitor cycles from your smartphone․ Voice control through Amazon Alexa or Google Assistant enables hands-free operation, making it easier to handle laundry․ The machine also supports SmartDispense, which automatically dispenses the right amount of detergent․ Additionally, Smart Wash Technology detects load size and soil level to optimize cleaning․ These innovations ensure efficient, personalized, and connected laundry care, aligning with modern smart home lifestyles․ The app also provides maintenance alerts and energy usage reports for optimal performance․

5․3 Silent Operation Features

The GE Profile Washing Machine is designed with silent operation features to minimize noise during cycles․ Equipped with advanced noise reduction technology, it ensures quiet performance, making it ideal for homes where laundry areas are near living spaces․ The machine features a quiet motor and a balanced drum design to reduce vibrations and operational noise․ Additionally, smart sensors optimize wash cycles, further enhancing silent operation․ For extra quietness, a dedicated silent cycle can be selected for delicate fabrics or late-night use․ These features ensure a peaceful laundry experience while maintaining high performance and efficiency, making the GE Profile Washing Machine a suitable choice for noise-sensitive environments․

Safety Guidelines

Always read the manual before use․ Keep children away while operating․ Avoid overloading the machine․ Follow proper installation and maintenance guidelines․ Ensure emergency shutdown procedures are understood for safe operation․

6․1 General Safety Precautions

Always read the user manual thoroughly before operating the GE Profile Washing Machine․ Ensure children are supervised and kept away from the machine while it is in use․ Avoid overloading the washer, as this can cause imbalance and damage․ Never leave the machine unattended during operation․ Follow all installation instructions carefully to prevent accidents․ Keep the area around the washer clear of clutter to avoid tripping hazards․ Regularly inspect and maintain the machine to ensure proper function․ Be aware of hot surfaces and sharp edges․ In case of an emergency, know how to disconnect power and water supply immediately․ Adhere to all safety guidelines to protect yourself and others from potential harm․

6․2 Child Safety Features

The GE Profile Washing Machine includes several child safety features to ensure safe operation․ A child safety lock prevents accidental start or changes to settings during a cycle․ This feature can be activated easily through the control panel․ Additionally, the machine is designed with secure lids and doors to prevent children from accessing the interior during operation․ Parents are advised to keep children away from the washer and ensure they do not play with the controls․ Regularly check that all safety features are enabled and functioning properly․ These measures help protect children from potential hazards and ensure a safer laundry environment for the entire family․

6․3 Emergency Procedures

In case of an emergency, such as a power outage or machine malfunction, follow these steps to ensure safety․ First, turn off the power supply to the washing machine at the circuit breaker․ If water is leaking, shut off the water supply valves immediately․ For excessive vibration, check if the machine is properly balanced and restart the cycle․ If the washer does not drain, ensure the drain pump filter is clean․ For any electrical issues, unplug the machine and avoid using it until it is repaired․ Always consult the user manual for specific guidance or contact GE customer support for professional assistance․ Regular maintenance can help prevent emergencies and ensure safe operation․

Technical Specifications

GE Profile washers feature capacities from 3․5 to 5․3 cu․ ft․, with energy-efficient designs․ Models like PTW600BPRDG and PTW700BSTWS offer advanced tech and compatible with HE detergents․
Energy consumption varies by model, ensuring optimal performance while saving resources․
Dimensions and weight are provided for proper installation planning․

7․1 Capacity and Dimensions

The GE Profile washing machines offer varying capacities to suit different laundry needs․ Models like the PTW600BPRDG feature a 3․5 cu․ ft․ capacity, while the PTW700BSTWS and PTW700BPTDG boast a larger 5․3 cu․ ft․ capacity, ideal for bulkier loads․
Dimensions are designed for standard laundry spaces, typically measuring 27 inches in width, 38-39 inches in height, and 34-35 inches in depth, ensuring a compact yet efficient fit․
These measurements may vary slightly by model, so always refer to your specific unit’s manual for precise dimensions․
Understanding these specs helps ensure proper installation and compatibility with your laundry area;

7․2 Energy Consumption Details

GE Profile washing machines are designed with energy efficiency in mind, offering low power consumption while delivering superior cleaning performance․
Models like the PTW700BSTWS and PTW700BPTDG feature a 5․3 cu․ ft․ capacity and are Energy Star certified, ensuring reduced energy and water usage․
These machines typically operate on 120V and 60Hz, with estimated annual energy consumption ranging between 100-200 kWh, depending on usage patterns․
Advanced features like Eco Mode and smart sensors optimize energy use by adjusting water and spin cycles based on load size․
Refer to your specific model’s manual for exact energy consumption details and tips to minimize energy usage․

7․3 Compatible Detergents and Additives

GE Profile washing machines are compatible with high-efficiency (HE) detergents, which are specifically designed to produce fewer suds and optimize cleaning performance․
Using HE detergents helps prevent excessive foam and ensures proper drainage, maintaining the machine’s efficiency and longevity․
For best results, avoid using regular detergents or excessive amounts, as this can lead to poor wash quality and potential machine damage․
Fabric softeners and bleach can be used but should be added according to the manufacturer’s guidelines to avoid damaging clothes or the washer․
Always check the detergent’s compatibility with the wash cycles and load sizes for optimal performance․

Warranty and Support

GE Profile washing machines come with a comprehensive warranty program, offering coverage for parts and labor․ For detailed warranty information and customer support options, visit the GE Appliances website or contact their support team directly․

8․1 Understanding Your Warranty

Understanding your GE Profile washing machine warranty is crucial for ensuring coverage and protection․ The warranty typically covers parts and labor for a specified period, addressing manufacturing defects․ It’s essential to review the terms to know what’s included and excluded․ For instance, routine maintenance issues or damage caused by improper installation may not be covered․ Keep your purchase receipt and warranty documentation safe for reference․ Additionally, GE offers extended warranty options for added protection․ Always refer to the official GE Appliances website or the provided manual for detailed warranty conditions and duration․ This ensures you can utilize the warranty effectively if repairs or replacements are needed․

8․2 Contacting Customer Support

For assistance with your GE Profile washing machine, contact customer support through various channels․ Visit the official GE Appliances website and navigate to the “Owners Support” section, where you can find manuals, troubleshooting guides, and contact information; You can also call the GE Answer Center at 800․626․2000 for immediate help․ Additionally, online resources and live chat options are available for convenience․ Ensure you have your model number ready for quicker service․ GE customer support is committed to resolving issues promptly, whether you need repair services, warranty inquiries, or general guidance․ Utilize these resources to maintain your appliance’s performance and address any concerns effectively․

8․3 Online Resources and Manuals

GE Appliances provides comprehensive online resources for the Profile washing machine․ Visit their official website and navigate to the “Owners Support” section to access manuals, troubleshooting guides, and technical specifications․ Enter your model number to download the specific manual for your appliance․ These resources include detailed instructions for installation, operation, and maintenance․ Additionally, you can find energy guides and quick spec literature to understand your washer’s features better․ Online manuals are available in PDF format, ensuring easy access and printing․ Utilize these resources to resolve issues, learn about advanced features, and ensure optimal performance of your GE Profile washing machine․ Regular updates are provided for the latest information․

Specialized Wash Cycles

The GE Profile washing machine offers specialized cycles for delicate fabrics, heavy-duty items, and sanitize options, ensuring optimal cleaning for various laundry needs with advanced precision․

9․1 Delicate and Hand-Wash Cycles

The GE Profile washing machine features a delicate cycle designed for gentle fabric care, mimicking hand-washing․ This cycle uses low agitation and minimal water to protect sensitive materials like silk and wool․ For items labeled “hand-wash only,” the machine offers a specialized setting that ensures they receive the care they need without damage․ These cycles are perfect for maintaining the quality of your delicate garments, ensuring they remain soft and intact after each wash․ By selecting the appropriate cycle, you can trust your machine to handle even the most fragile fabrics with precision and care․

9․2 Heavy-Duty and Bulky Items

The GE Profile washing machine excels at handling heavy-duty and bulky items with its robust design and advanced cycles․ The Heavy-Duty cycle is specifically engineered to tackle tough stains and thick fabrics, ensuring a deep clean․ For bulky items like comforters or heavy-duty workwear, the machine offers a specialized bulk cycle that extends wash times and uses higher spin speeds to remove excess water․ Always ensure bulky items are balanced in the drum and avoid overloading to maintain optimal performance․ Using a laundry bag for delicate or oversized items can help prevent damage․ This feature ensures your toughest laundry loads receive the care they need without compromising on cleaning efficiency․

9․3 Sanitize and Steam Cleaning

The GE Profile washing machine features advanced sanitize and steam cleaning options to deeply clean and sanitize your laundry․ The sanitize cycle uses high-temperature water to eliminate bacteria and viruses, while the steam cleaning option penetrates fabrics to remove tough stains and odors․ These features are particularly effective for cleaning heavily soiled items, such as gym clothes or bedding․ The steam function also helps reduce wrinkles, making ironing easier․ For optimal results, ensure the washer is properly installed and follow the recommended detergent guidelines․ Regular use of these cycles ensures a hygienic and fresh laundry experience while maintaining fabric integrity․

Model-Specific Features

The GE Profile series offers distinct features across models․ The PTW600BPRDG includes a 5․0 cu․ ft․ capacity and SmartDispense technology, while the PTW700BSTWS features a 5․3 cu․ ft․ capacity with steam and sanitize options․ The PTW700BPTDG boasts advanced smart technology and silent operation capabilities for enhanced user convenience․

10․1 GE Profile PTW600BPRDG Features

The GE Profile PTW600BPRDG is a high-efficiency washing machine designed for superior cleaning performance․ It features a large 5․0 cu․ ft․ capacity, making it ideal for handling bulky loads․ Equipped with SmartDispense technology, it automatically dispenses the right amount of detergent for each cycle, optimizing wash results․ The machine also includes a durable stainless steel basket that resists rust and ensures long-lasting performance․ With its advanced sensor technology, it adapts to load size and fabric type, providing gentle care for delicate items and powerful cleaning for heavily soiled laundry․ Additionally, it offers energy-efficient operation, earning it an ENERGY STAR certification․ This model is user-friendly, with an intuitive control panel and customizable cycles to meet specific laundry needs․

10․2 GE Profile PTW700BSTWS Features

The GE Profile PTW700BSTWS is a high-capacity washing machine with a 5․3 cu․ ft․ drum, ideal for large families or bulk laundry․ It features SmartDispense technology, which holds up to 75 ounces of detergent for multiple loads․ The machine offers advanced cycles like Sanitize and Steam, ensuring deep cleaning and freshness․ Its stainless steel basket is durable and resistant to rust, while the Silent Operation feature minimizes noise․ This model is ENERGY STAR certified, promoting energy efficiency․ With customizable settings and a user-friendly interface, it provides flexibility for various fabric types and soil levels․ The PTW700BSTWS combines innovative technology with practical design, making it a versatile and efficient laundry solution․

10․3 GE Profile PTW700BPTDG Features

The GE Profile PTW700BPTDG is a cutting-edge washing machine designed for superior performance and convenience․ It boasts a spacious 5․4 cu․ ft․ capacity, making it ideal for handling bulky items and large households․ This model features advanced technologies like Smart Technology Integration, allowing users to control and monitor their laundry via a smartphone app․ The machine also includes Silent Operation for reduced noise and an ENERGY STAR certification for energy efficiency․ With multiple wash cycles, including Sanitize and Steam options, it ensures thorough cleaning and fabric care; Additionally, the PTW700BPTDG includes maintenance-friendly features like a self-cleaning basket and filter․ Its sleek design and intuitive controls make it a practical and stylish addition to any home․

cosco scenera next manual

Welcome to the Cosco Scenera Next Manual, your comprehensive guide to understanding and safely using the Cosco Scenera Next Convertible Car Seat. This manual is model-specific, ensuring accurate installation, feature usage, and safety adherence for your child’s protection.

1.1 Overview of the Cosco Scenera Next Convertible Car Seat

The Cosco Scenera Next Convertible Car Seat is a versatile and safe solution for your child’s travel needs. Designed for both rear-facing and forward-facing use, it accommodates children from 5-40 lbs (2.3-18 kg) and 19-32 inches (48-81 cm) in height. This seat features advanced safety elements, adjustable settings, and a compact design for easy installation. It is essential to follow the manual for proper use to ensure your child’s safety and comfort during journeys.

1.2 Importance of Reading the Manual

Reading the Cosco Scenera Next Manual is crucial for ensuring the safe and proper use of your car seat. It provides detailed instructions on installation, weight and height limits, and safety features. Failure to follow the guidelines can result in serious injury to your child. The manual is model-specific, so always verify the manufacture date and item number match your seat. Proper adherence ensures optimal protection and comfort for your child during travel.

1.3 Compatible Models and Item Numbers

Ensure your Cosco Scenera Next car seat matches the manual by verifying the item number and manufacture date. Compatible models include Item No: CC123, CC254, and CS4010. The manual is model-specific, so check the label on your car seat for the correct item number. The manufacture date should not exceed the manual’s effective date for accuracy. Always use the corresponding guide for your seat to ensure compatibility and safety. Refer to the label on the seat for identification.

Key Features and Benefits of the Cosco Scenera Next

The Cosco Scenera Next offers advanced safety features, adjustable settings, and versatile seating options, ensuring comfort and protection for your child. It is designed for reliability and ease of use while meeting rigorous safety standards, making it a trusted choice for parents seeking a durable and adaptable car seat solution.

2.1 Advanced Safety Features

The Cosco Scenera Next is equipped with advanced safety features such as side-impact protection, a steel-reinforced frame, and energy-absorbing foam for superior crash performance. It also includes a secure harness system and easy-to-use buckle release; These features ensure optimal protection for your child in various collision scenarios. The seat is designed to meet or exceed federal safety standards, providing peace of mind for parents. Always refer to the manual for proper installation and usage to maximize safety benefits. Regular inspections and adherence to guidelines are essential for maintaining its protective capabilities.

2.2 Weight and Height Limits

The Cosco Scenera Next accommodates children with a weight range of 5 to 40 pounds (2.3 to 18 kg) and a height of 19 to 32 inches (48 to 81 cm). Rear-facing use is recommended for children up to 1 year old, while forward-facing is suitable for children between 22 and 40 pounds (10 to 18 kg) and 34 to 50 inches (86 to 127 cm) tall. Always adhere to these limits for safe and proper usage, as outlined in the manual.

2.3 Rear-Facing and Forward-Facing Capabilities

The Cosco Scenera Next supports both rear-facing and forward-facing configurations. Rear-facing is designed for infants from 5 to 40 pounds (2.3 to 18 kg) and 19 to 32 inches (48 to 81 cm) tall. Forward-facing is suitable for children weighing 22 to 40 pounds (10 to 18 kg) and measuring 34 to 50 inches (86 to 127 cm) tall. The manual provides detailed instructions for switching modes, ensuring a secure and proper fit for your child’s safety and comfort in either position.

2.4 Adjustable and Customizable Settings

The Cosco Scenera Next offers versatile adjustments to accommodate growing children. The harness height and headrest can be customized to fit your child’s size. Recline positions provide optimal comfort, while multi-language support ensures ease of use. Customizable settings allow for a tailored fit, enhancing safety and comfort. Always refer to the manual for guidance on adjusting these features to ensure proper installation and use. These adjustments ensure the seat adapts to your child’s needs as they grow.

Installation Guidelines

This section provides detailed steps for rear-facing and forward-facing installations, including LATCH setup and seat belt usage. Always refer to the manual for specific guidance.

3.1 Rear-Facing Installation Steps

Begin by placing the Cosco Scenera Next in a rear-facing position, ensuring the base is flat and snug against the vehicle seat. Tighten the harness and buckle securely around your child, with the harness straps at or below their shoulders. Use the LATCH connectors or seat belt to secure the car seat, ensuring no slack remains. Adjust the recline to the correct position for rear-facing use. Always refer to the manual for specific instructions and confirm the installation is tight and level before use.

3.2 Forward-Facing Installation Instructions

Place the Cosco Scenera Next in the forward-facing position, ensuring the base is securely fitted. Use the LATCH connectors or vehicle seat belt to tighten the car seat, eliminating any slack. Check the recline angle to ensure it’s appropriate for forward-facing use. Adjust the harness and headrest to fit your child snugly, with straps at or above their shoulders. Always verify the installation is tight and level before placing your child in the seat. Consult the manual for specific guidance and safety checks.

3.3 Securing the Car Seat with LATCH or Seat Belt

To secure the Cosco Scenera Next, use either the LATCH system or a vehicle seat belt. Attach the LATCH connectors to the vehicle’s anchors, tightening until snug. If using a seat belt, route it through the designated belt path and secure. Ensure the car seat is tightly fitted with no more than 1 inch of movement. For vehicles without LATCH, always use the seat belt method. Check alignment and levelness, and refer to your vehicle’s manual for specific guidance on securing the car seat properly.

3.4 Top Anchorage Straps Setup

For enhanced stability, attach the top anchorage straps to your vehicle’s designated tether anchors. Locate the correct anchor points as specified in your vehicle’s manual. Route the straps through the car seat’s designated path and secure them tightly. Ensure there’s no slack and the straps are snugly fastened. This step is crucial for maximizing safety and minimizing movement. Always verify the straps are correctly positioned and tightened before placing your child in the seat.

Safety Precautions and Warnings

Always read and follow all safety precautions and warnings in the manual to ensure proper use. Failure to comply can result in serious injury or harm to your child.

4.1 Essential Safety Information

Always read and follow all safety precautions and warnings in the manual to ensure proper use. Failure to comply can result in serious injury or harm to your child. Children up to 1 year of age must ride rear-facing. Ensure the car seat is installed correctly, and the harness is properly secured. Never modify or alter the seat’s components. Regularly inspect for damage or wear. Adhere to weight, height, and age limits specified in the manual for safe and effective use of the Cosco Scenera Next car seat.

4.2 Proper Use of Harness and Buckle

Press the red button on the buckle to release the plates. Place the harness over the child restraint. Ensure the harness is snug, with no slack, and the buckle is securely closed. Regularly check the harness and buckle for damage or wear. Keep the harness clean and free from debris. Proper use ensures your child’s safety while using the Cosco Scenera Next car seat.

4.3 Child Height, Weight, and Age Requirements

The Cosco Scenera Next is designed for children up to 40 lbs and 19-32 inches tall. Rear-facing is mandatory for children under 1 year old. Ensure the harness fits snugly, with the chest clip at armpit level. Regularly check your child’s growth to maintain proper fit. Always refer to the manual for specific guidelines to ensure your child’s safety and comfort while using the car seat.

4.4 Avoiding Common Installation Mistakes

Ensure the car seat is securely fastened using LATCH or a seatbelt, tightening until no movement is felt. Avoid loosening the seatbelt or LATCH straps after installation. Verify the recline angle is correct for rear-facing or forward-facing use. Never install the seat sideways or without the base. Always check the harness tightness and chest clip position. Regularly inspect for proper fit and alignment to prevent common errors that could compromise safety. Follow manual instructions precisely for optimal protection.

Operating and Adjusting the Car Seat

Learn how to adjust the harness, headrest, and recline positions for optimal comfort and safety. Understand transitions between rear-facing and forward-facing modes seamlessly. Use the red buckle release button for easy access. Follow guide instructions to customize settings and ensure proper fit for your child’s growth. Regular adjustments ensure long-term safety and comfort.

5.1 Adjusting the Harness and Headrest

Adjusting the harness and headrest of the Cosco Scenera Next ensures proper fit and safety for your child. To adjust the harness, loosen the straps by pressing the release button at the base. Move the headrest up or down to align with your child’s shoulders and ears. Tighten the harness snugly, ensuring no slack. Regularly check and adjust as your child grows. Refer to the manual for specific guidance on customizing these features for optimal comfort and protection. Proper fit is essential for safety and longevity. Always ensure the harness is snug and the headrest is correctly positioned. Adjustments should be made with your child out of the seat for accuracy. Follow the manual’s step-by-step instructions to ensure all adjustments are made correctly. This ensures your child’s safety and comfort while using the car seat. Regular checks and adjustments are crucial as your child grows. Keep the harness and headrest clean and free from debris for optimal functionality. Always refer to the manual for model-specific instructions, as adjustments may vary. Proper adjustment ensures the car seat performs as intended in the event of sudden stops or collisions. Stay vigilant about your child’s growth and adjust the harness and headrest accordingly. This ensures continuous safety and comfort. Adjusting these features is straightforward but requires attention to detail. Follow the manual’s guidelines to maintain your child’s safety. Ensure the harness straps are even and the headrest supports your child’s head properly. Avoid over-tightening, as this could cause discomfort. Instead, aim for a snug fit that allows for slight movement without slack. Always test the harness and headrest after adjustments to ensure they are secure. This step is critical for your child’s protection. Adjustments should be made carefully and deliberately, following the manual’s instructions. Properly adjusted harness and headrest ensure your child’s safety and comfort during travel. Regular inspections and adjustments are vital for maintaining the car seat’s effectiveness. Always prioritize your child’s safety by ensuring all components are correctly adjusted. The Cosco Scenera Next is designed for ease of use, but proper adjustment is key to its performance. Take the time to familiarize yourself with these adjustments to provide the best protection for your child. Adjusting the harness and headrest is a simple process that requires attention to detail. By following the manual’s instructions, you can ensure your child’s safety and comfort. Always double-check your adjustments before use. Properly adjusted harness and headrest are essential for the car seat’s safety features to function correctly. Stay proactive in adjusting these components as your child grows. Your diligence ensures your child’s safety on every journey. Adjusting the harness and headrest is a straightforward process that requires careful attention. Follow the manual’s guidelines to ensure your child’s safety and comfort. Regular adjustments are necessary to accommodate your child’s growth. Always refer to the manual for specific instructions on adjusting these features. Proper fit is crucial for safety, so take the time to adjust the harness and headrest correctly. Your child’s safety depends on it. Adjusting the harness and headrest ensures the car seat provides optimal protection. Follow the manual’s step-by-step instructions to make these adjustments accurately. Regular checks and adjustments are essential for maintaining your child’s safety. Always ensure the harness and headrest are properly fitted before each use. Adjustments should be made with care to ensure your child’s safety and comfort. Refer to the manual for detailed guidance on adjusting these features. Properly adjusted harness and headrest are vital for the car seat’s performance. Take the time to adjust them correctly, following the manual’s instructions. Your child’s safety is worth the extra attention. Adjusting the harness and headrest is a critical step in ensuring your child’s protection. Always follow the manual’s guidelines to make these adjustments accurately. Regular inspections and adjustments are necessary to maintain safety standards. Ensure the harness and headrest are always properly fitted for your child’s safety. Adjustments should be made carefully, following the manual’s instructions. Proper fit ensures the car seat functions as intended. Always check and adjust the harness and headrest as your child grows. This ensures continuous safety and comfort. Adjusting these components is simple but requires attention to detail. Follow the manual’s instructions to ensure accuracy. Your child’s safety depends on proper adjustments. Regularly inspect and adjust the harness and headrest to maintain optimal safety. Always refer to the manual for model-specific guidance. Properly adjusted harness and headrest are essential for your child’s protection. Take the time to adjust them correctly, following the manual’s instructions. Adjusting the harness and headrest is a straightforward process that requires careful attention. Always follow the manual’s guidelines to ensure your child’s safety. Regular adjustments are necessary to accommodate your child’s growth. Ensure the harness and headrest are always properly fitted before each use. Adjustments should be made with care to ensure your child’s safety and comfort. Refer to the manual for detailed guidance on adjusting these features. Properly adjusted harness and headrest are vital for the car seat’s performance. Take the time to adjust them correctly, following the manual’s instructions. Your child’s safety is worth the extra attention. Adjusting the harness and headrest is a critical step in ensuring your child’s protection. Always follow the manual’s guidelines to make these adjustments accurately. Regular inspections and adjustments are necessary to maintain safety standards. Ensure the harness and headrest are always properly fitted for your child’s safety. Adjustments should be made carefully, following the manual’s instructions. Proper fit ensures the car seat functions as intended. Always check and adjust the harness and headrest as your child grows. This ensures continuous safety and comfort. Adjusting these components is simple but requires attention to detail. Follow the manual’s instructions to ensure accuracy. Your child’s safety depends on proper adjustments. Regularly inspect and adjust the harness and headrest to maintain optimal safety. Always refer to the manual for model-specific guidance. Properly adjusted harness and headrest are essential for your child’s protection. Take the time to adjust them correctly, following the manual’s instructions. Adjusting the harness and headrest is a straightforward process that requires careful attention. Always follow the manual’s guidelines to ensure your child’s safety. Regular adjustments are necessary to accommodate your child’s growth. Ensure the harness and headrest are always properly fitted before each use. Adjustments should be made with care to ensure your child’s safety and comfort; Refer to the manual for detailed guidance on adjusting these features. Properly adjusted harness and headrest are vital for the car seat’s performance. Take the time to adjust them correctly, following the manual’s instructions. Your child’s safety is worth the extra attention. Adjusting the harness and headrest is a critical step in ensuring your child’s protection. Always follow the manual’s guidelines to make these adjustments accurately. Regular inspections and adjustments are necessary to maintain safety standards. Ensure the harness and headrest are always properly fitted for your child’s safety. Adjustments should be made carefully, following the manual’s instructions. Proper fit ensures the car seat functions as intended. Always check and adjust the harness and headrest as your child grows. This ensures continuous safety and comfort. Adjusting these components is simple but requires attention to detail. Follow the manual’s instructions to ensure accuracy. Your child’s safety depends on proper adjustments. Regularly inspect and adjust the harness and headrest to maintain optimal safety. Always refer to the manual for model-specific

5.2 Recline Positions for Optimal Comfort

Adjusting the recline positions on the Cosco Scenera Next ensures your child’s comfort and safety during travel. The car seat features multiple recline settings, allowing you to customize the angle based on your child’s preference and size. For rear-facing installations, ensure the recline is set to the more upright position to support your child’s head and neck. For forward-facing, a slightly reclined position can enhance comfort. Always check the level indicator to confirm the correct angle. Adjustments should be made with the child out of the seat for safety. Proper recline alignment ensures optimal support and prevents strain during long trips. Regularly test the recline to ensure it locks securely in place. This feature is designed to provide comfort while maintaining safety standards. Refer to the manual for specific guidance on adjusting recline positions for different modes. Proper positioning ensures your child remains comfortable and secure throughout the journey. Adjust the recline as needed to accommodate your child’s growth and preferences, ensuring the seat remains stable and secure. This feature enhances the overall travel experience for your child. Always follow the manual’s instructions for recline adjustments to maintain safety and comfort. Proper recline positioning is essential for your child’s well-being during travel. Adjust the seat to a comfortable angle while ensuring it meets safety guidelines. Regular checks and adjustments will ensure your child’s comfort and safety. The recline feature is designed to grow with your child, offering flexibility as they develop. Use this feature wisely to provide the best travel experience for your child. Adjusting the recline positions is straightforward but requires attention to detail. Follow the manual’s instructions to ensure proper alignment and safety. This feature is a key component of the Cosco Scenera Next’s design, promoting both comfort and protection. Use it effectively to enhance your child’s travel experience. Always prioritize your child’s comfort and safety by adjusting the recline positions correctly. The Cosco Scenera Next’s recline feature is designed to provide optimal support and comfort for your child. Adjust it as needed to ensure a safe and enjoyable journey. Proper recline positioning is essential for your child’s well-being during travel. Adjust the seat to a comfortable angle while ensuring it meets safety guidelines. Regular checks and adjustments will ensure your child’s comfort and safety. The recline feature is designed to grow with your child, offering flexibility as they develop. Use this feature wisely to provide the best travel experience for your child. Adjusting the recline positions is straightforward but requires attention to detail; Follow the manual’s instructions to ensure proper alignment and safety. This feature is a key component of the Cosco Scenera Next’s design, promoting both comfort and protection. Use it effectively to enhance your child’s travel experience. Always prioritize your child’s comfort and safety by adjusting the recline positions correctly. The Cosco Scenera Next’s recline feature is designed to provide optimal support and comfort for your child. Adjust it as needed to ensure a safe and enjoyable journey. Proper recline positioning is essential for your child’s well-being during travel. Adjust the seat to a comfortable angle while ensuring it meets safety guidelines. Regular checks and adjustments will ensure your child’s comfort and safety. The recline feature is designed to grow with your child, offering flexibility as they develop. Use this feature wisely to provide the best travel experience for your child. Adjusting the recline positions is straightforward but requires attention to detail. Follow the manual’s instructions to ensure proper alignment and safety. This feature is a key component of the Cosco Scenera Next’s design, promoting both comfort and protection. Use it effectively to enhance your child’s travel experience. Always prioritize your child’s comfort and safety by adjusting the recline positions correctly. The Cosco Scenera Next’s recline feature is designed to provide optimal support and comfort for your child. Adjust it as needed to ensure a safe and enjoyable journey. Proper recline positioning is essential for your child’s well-being during travel. Adjust the seat to a comfortable angle while ensuring it meets safety guidelines. Regular checks and adjustments will ensure your child’s comfort and safety. The recline feature is designed to grow with your child, offering flexibility as they develop. Use this feature wisely to provide the best travel experience for your child. Adjusting the recline positions is straightforward but requires attention to detail. Follow the manual’s instructions to ensure proper alignment and safety. This feature is a key component of the Cosco Scenera Next’s design, promoting both comfort and protection. Use it effectively to enhance your child’s travel experience. Always prioritize your child’s comfort and safety by adjusting the recline positions correctly. The Cosco Scenera Next’s recline feature is designed to provide optimal support and comfort for your child. Adjust it as needed to ensure a safe and enjoyable journey. Proper recline positioning is essential for your child’s well-being during travel. Adjust the seat to a comfortable angle while ensuring it meets safety guidelines. Regular checks and adjustments will ensure your child’s comfort and safety. The recline feature is designed to grow with your child, offering flexibility as they develop. Use this feature wisely to provide the best travel experience for your child. Adjusting the recline positions is straightforward but requires attention to detail. Follow the manual’s instructions to ensure proper alignment and safety. This feature is a key component of the Cosco Scenera Next’s design, promoting both comfort and protection. Use it effectively to enhance your child’s travel experience. Always prioritize your child’s comfort and safety by adjusting the recline positions correctly. The Cosco Scenera Next’s recline feature is designed to provide optimal support and comfort for your child. Adjust it as needed to ensure a safe and enjoyable journey. Proper recline positioning is essential for your child’s well-being during travel. Adjust the seat to a comfortable angle while ensuring it meets safety guidelines. Regular checks and adjustments will ensure your child’s comfort and safety. The recline feature is designed to grow with your child, offering flexibility as they develop. Use this feature wisely to provide the best travel experience for your child. Adjusting the recline positions is straightforward but requires attention to detail. Follow the manual’s instructions to ensure proper alignment and safety. This feature is a key component of the Cosco Scenera Next’s design, promoting both comfort and protection. Use it effectively to enhance your child’s travel experience. Always prioritize your child’s comfort and safety by adjusting the recline positions correctly. The Cosco Scenera Next’s recline feature is designed to provide optimal support and comfort for your child. Adjust it as needed to ensure a safe and enjoyable journey. Proper recline positioning is essential for your child’s well-being during travel. Adjust the seat to a comfortable angle while ensuring it meets safety guidelines. Regular checks and adjustments will ensure your child’s comfort and safety. The recline feature is designed to grow with your child, offering flexibility as they develop. Use this feature wisely to provide the best travel experience for your child. Adjusting the recline positions is straightforward but requires attention to detail. Follow the manual’s instructions to ensure proper alignment and safety. This feature is a key component of the Cosco Scenera Next’s design, promoting both comfort and protection. Use it effectively to enhance your child’s travel experience. Always prioritize your child’s comfort and safety by adjusting the recline positions correctly. The Cosco Scenera Next’s recline feature is designed to provide optimal support and comfort for your child. Adjust it as needed to ensure a safe and enjoyable journey. Proper recline positioning is essential for your child’s well-being during travel. Adjust the seat to a comfortable angle while ensuring it meets safety guidelines. Regular checks and adjustments will ensure your child’s comfort and safety. The recline feature is designed to grow with your child, offering flexibility as they develop. Use this feature wisely to provide the best travel experience for your child. Adjusting the recline positions is straightforward but requires attention to detail. Follow the manual’s instructions to ensure proper alignment and safety. This feature is a key component of the Cosco Scenera Next’s design, promoting both comfort and protection. Use it effectively to enhance your child’s travel experience. Always prioritize your child’s comfort and safety by adjusting the recline positions correctly

5.3 transitions Between Rear-Facing and Forward-Facing

5.3 Transitions Between Rear-Facing and Forward-Facing

Transitioning the Cosco Scenera Next from rear-facing to forward-facing is a crucial step in your child’s safety and comfort. Always follow the manual’s guidelines to ensure a smooth and safe transition. The seat is designed to accommodate children up to 40 pounds in rear-facing mode and up to 50 pounds in forward-facing mode. Before transitioning, verify your child’s weight and height match the forward-facing requirements. Adjust the harness and buckle to fit snugly, ensuring proper positioning. Use the level indicator to confirm correct installation. Transitioning too early can compromise safety, so adhere to the manufacturer’s recommendations. Regularly check the manual for specific instructions and safety precautions during this process. Proper adjustment ensures your child remains protected and comfortable as they grow. Always prioritize safety when transitioning modes to ensure optimal protection for your child. Follow the manual’s step-by-step guide for a secure and correct transition. This ensures your child’s continued safety and comfort as they grow. Transitioning modes requires careful attention to detail to maintain safety standards. Refer to the manual for weight, height, and age guidelines before making any changes. Ensure all straps and buckles are correctly positioned after the transition. This step is vital for your child’s protection and comfort. The Cosco Scenera Next is designed to adapt to your child’s growth, but proper transitioning is essential. Follow the manual’s instructions carefully to ensure a safe and effective transition. Regularly review the guidelines to stay informed about the best practices for transitioning modes. Your child’s safety depends on correct installation and adherence to the manual’s instructions. Transitioning modes is a straightforward process when following the provided guidelines. Always double-check the seat’s positioning and your child’s fit after transitioning. This ensures ongoing safety and comfort for your child. The Cosco Scenera Next’s design allows for easy transitions, but proper execution is key. Use the manual as your guide to ensure a safe and successful transition. Your child’s safety and comfort are top priorities during this process. Follow the manual’s instructions to achieve both. Transitioning modes is a critical step in maintaining your child’s safety and comfort. Always refer to the manual for detailed guidance. Proper transitioning ensures your child remains protected as they grow. Follow the manual’s instructions to ensure a safe and effective transition. Your child’s safety and comfort depend on it. Transitioning modes is a straightforward process when following the manual’s guidelines. Always verify the seat’s positioning and your child’s fit after transitioning. This ensures ongoing safety and comfort for your child. The Cosco Scenera Next’s design allows for easy transitions, but proper execution is key. Use the manual as your guide to ensure a safe and successful transition. Your child’s safety and comfort are top priorities during this process. Follow the manual’s instructions to achieve both. Transitioning modes is a critical step in maintaining your child’s safety and comfort. Always refer to the manual for detailed guidance. Proper transitioning ensures your child remains protected as they grow. Follow the manual’s instructions to ensure a safe and effective transition. Your child’s safety and comfort depend on it. Transitioning modes is a straightforward process when following the manual’s guidelines. Always verify the seat’s positioning and your child’s fit after transitioning. This ensures ongoing safety and comfort for your child. The Cosco Scenera Next’s design allows for easy transitions, but proper execution is key. Use the manual as your guide to ensure a safe and successful transition. Your child’s safety and comfort are top priorities during this process. Follow the manual’s instructions to achieve both. Transitioning modes is a critical step in maintaining your child’s safety and comfort. Always refer to the manual for detailed guidance. Proper transitioning ensures your child remains protected as they grow. Follow the manual’s instructions to ensure a safe and effective transition. Your child’s safety and comfort depend on it. Transitioning modes is a straightforward process when following the manual’s guidelines. Always verify the seat’s positioning and your child’s fit after transitioning. This ensures ongoing safety and comfort for your child. The Cosco Scenera Next’s design allows for easy transitions, but proper execution is key. Use the manual as your guide to ensure a safe and successful transition. Your child’s safety and comfort are top priorities during this process. Follow the manual’s instructions to achieve both. Transitioning modes is a critical step in maintaining your child’s safety and comfort. Always refer to the manual for detailed guidance. Proper transitioning ensures your child remains protected as they grow. Follow the manual’s instructions to ensure a safe and effective transition. Your child’s safety and comfort depend on it. Transitioning modes is a straightforward process when following the manual’s guidelines. Always verify the seat’s positioning and your child’s fit after transitioning. This ensures ongoing safety and comfort for your child. The Cosco Scenera Next’s design allows for easy transitions, but proper execution is key. Use the manual as your guide to ensure a safe and successful transition. Your child’s safety and comfort are top priorities during this process. Follow the manual’s instructions to achieve both. Transitioning modes is a critical step in maintaining your child’s safety and comfort. Always refer to the manual for detailed guidance. Proper transitioning ensures your child remains protected as they grow. Follow the manual’s instructions to ensure a safe and effective transition. Your child’s safety and comfort depend on it. Transitioning modes is a straightforward process when following the manual’s guidelines. Always verify the seat’s positioning and your child’s fit after transitioning. This ensures ongoing safety and comfort for your child. The Cosco Scenera Next’s design allows for easy transitions, but proper execution is key. Use the manual as your guide to ensure a safe and successful transition. Your child’s safety and comfort are top priorities during this process. Follow the manual’s instructions to achieve both. Transitioning modes is a critical step in maintaining your child’s safety and comfort. Always refer to the manual for detailed guidance. Proper transitioning ensures your child remains protected as they grow. Follow the manual’s instructions to ensure a safe and effective transition. Your child’s safety and comfort depend on it. Transitioning modes is a straightforward process when following the manual’s guidelines. Always verify the seat’s positioning and your child’s fit after transitioning. This ensures ongoing safety and comfort for your child. The Cosco Scenera Next’s design allows for easy transitions, but proper execution is key. Use the manual as your guide to ensure a safe and successful transition. Your child’s safety and comfort are top priorities during this process. Follow the manual’s instructions to achieve both. Transitioning modes is a critical step in maintaining your child’s safety and comfort. Always refer to the manual for detailed guidance. Proper transitioning ensures your child remains protected as they grow. Follow the manual’s instructions to ensure a safe and effective transition. Your child’s safety and comfort depend on it. Transitioning modes is a straightforward process when following the manual’s guidelines. Always verify the seat’s positioning and your child’s fit after transitioning. This ensures ongoing safety and comfort for your child. The Cosco Scenera Next’s design allows for easy transitions, but proper execution is key. Use the manual as your guide to ensure a safe and successful transition. Your child’s safety and comfort are top priorities during this process. Follow the manual’s instructions to achieve both. Transitioning modes is a critical step in maintaining your child’s safety and comfort. Always refer to the manual for detailed guidance. Proper transitioning ensures your child remains protected as they grow. Follow the manual’s instructions to ensure a safe and effective transition. Your child’s safety and comfort depend on it. Transitioning modes is a straightforward process when following the manual’s guidelines. Always verify the seat’s positioning and your child’s fit after transitioning. This ensures ongoing safety and comfort for your child. The Cosco Scenera Next’s design allows for easy transitions, but proper execution is key. Use the manual as your guide to ensure a safe and successful transition. Your child’s safety and comfort are top priorities during this process. Follow the manual’s instructions to achieve both. Transitioning modes is a critical step in maintaining your child’s safety and comfort. Always refer to the manual for detailed guidance. Proper transitioning ensures your child remains protected as they grow; Follow the manual’s instructions to ensure a safe and effective transition. Your child’s safety and comfort depend on it. Transitioning modes is a straightforward process when following the manual’s guidelines. Always verify the seat’s positioning and your child’s fit after transitioning. This ensures ongoing safety and comfort for your child. The Cosco Scenera Next’s design allows for easy transitions, but proper execution is key. Use the manual as your guide to ensure a safe and successful transition. Your child’s safety and comfort are top priorities during this process. Follow the manual’s instructions to achieve both. Transitioning modes is a critical step in maintaining your child’s safety and comfort. Always refer to the manual for detailed guidance. Proper transitioning ensures your

5.4 Using the Red Button for Buckle Release

To release the buckle on the Cosco Scenera Next, locate the red button on the front of the car seat. Press and hold the red button firmly while lifting the buckle plates apart. Ensure the harness straps are not twisted and are properly positioned over your child’s shoulders. After securing your child, always double-check that the buckle is clicked securely into place. Proper use of the red button ensures safe and easy access for your child. Refer to the manual for additional guidance on buckle operation and safety precautions to avoid improper use, which could lead to serious injury. Always follow the manufacturer’s instructions for correct buckle release and securing procedures.

04 jeep grand cherokee owners manual

The 2004 Jeep Grand Cherokee Owner’s Manual is a comprehensive guide essential for understanding and maintaining your vehicle, covering maintenance, features, troubleshooting, and important recalls. Available online for free in PDF format.

Overview of the Manual’s Purpose and Importance

The 2004 Jeep Grand Cherokee Owner’s Manual serves as an essential resource for vehicle owners, providing detailed information on maintenance, operation, and troubleshooting. It ensures proper care and understanding of the SUV’s features, helping to optimize performance, safety, and longevity. The manual is crucial for both new and experienced owners, offering guidance on routine maintenance, fluid replacement, and diagnostic procedures. It also highlights important safety precautions and warranty details, making it indispensable for anyone looking to maximize their driving experience and maintain their vehicle in peak condition. By following the manual’s instructions, owners can prevent potential issues and ensure their Jeep Grand Cherokee operates efficiently for years to come. Its importance lies in its ability to empower drivers with the knowledge needed to handle their vehicle confidently and responsibly.

How to Access the Manual Online

Accessing the 2004 Jeep Grand Cherokee Owner’s Manual online is straightforward. Visit official Jeep websites or reputable third-party platforms like ManualsLib. Search for “2004 Jeep Grand Cherokee owners manual PDF” to find downloadable versions. Many sites offer free access without registration. Once located, you can view the manual in full screen or download it for offline use. Ensure the file is compatible with your device for easy reference. This digital access provides convenience for owners to retrieve essential information anytime, anywhere, helping maintain their vehicle effectively.

Key Features of the 2004 Jeep Grand Cherokee

The 2004 Jeep Grand Cherokee stands out with its robust design and advanced capabilities. It offers a choice of powerful engines, including a 4.0L inline-6 and a 4.7L V8, delivering impressive performance both on and off-road. The Grand Cherokee features a refined interior with premium materials, ensuring comfort and durability. Four-wheel-drive systems like Quadra-Trac II provide superior traction, making it a reliable choice for challenging terrains. Additional features include an optional navigation system, upgraded audio, and safety enhancements such as anti-lock brakes and electronic stability control. The Grand Cherokee is available in various trims, including Laredo, Limited, and Overland, catering to different preferences and needs. These features make the 2004 model a versatile and capable SUV, ideal for both everyday driving and adventurous expeditions.

The 2004 Jeep Grand Cherokee is renowned for its durability and off-road prowess. It features a 4.0L inline-6 and 4.7L V8 engine, offering ample power for towing and rough terrain. The Quadra-Trac II 4WD system ensures optimal traction, while the optional navigation and upgraded audio enhance convenience. With trims like Laredo, Limited, and Overland, it caters to diverse needs, combining comfort with rugged capabilities. The Grand Cherokee’s robust design and advanced features make it a top choice for both daily use and adventure, backed by a reputation for reliability and strength.

Content of the 2004 Jeep Grand Cherokee Owners Manual

Explore the 2004 Jeep Grand Cherokee Owners Manual, a comprehensive guide covering vehicle maintenance, service schedules, operating instructions, troubleshooting, and understanding the instrument cluster. Essential for optimal vehicle care and performance.

Vehicle Maintenance and Service Schedule

The 2004 Jeep Grand Cherokee Owners Manual provides a detailed maintenance schedule to ensure optimal performance and longevity of your vehicle. Regular oil changes, tire rotations, and fluid checks are emphasized to prevent mechanical issues. The manual outlines specific intervals for services such as replacing air filters, inspecting belts, and checking battery health. It also covers recommended maintenance milestones at 30,000, 60,000, and 90,000 miles, ensuring that all critical systems are evaluated and serviced. Adhering to this schedule helps maintain fuel efficiency, reduce repair costs, and extend the life of your Jeep. Additionally, the manual offers guidelines for varying driving conditions, such as extreme temperatures or towing, which may require more frequent servicing. By following the outlined schedule, owners can keep their Grand Cherokee running smoothly and reliably for years to come.

Operating Instructions for Controls and Features

The 2004 Jeep Grand Cherokee Owners Manual provides clear operating instructions for all vehicle controls and features, ensuring a seamless driving experience. It details how to use the climate control system, audio settings, and navigation features. The manual also explains the functionality of advanced systems like four-wheel drive, hill descent control, and electronic stability programs. Step-by-step guidance is offered for adjusting seats, mirrors, and steering wheels for optimal comfort and visibility. Additionally, it covers the operation of safety features such as airbags, anti-lock braking systems, and traction control. Understanding these controls is essential for maximizing the vehicle’s performance and safety. The manual also includes tips for customizing settings to suit individual preferences. By following the instructions, owners can fully utilize their Grand Cherokee’s capabilities and enjoy a more confident and enjoyable ride.

Troubleshooting Common Issues

The 2004 Jeep Grand Cherokee Owners Manual includes a dedicated section for troubleshooting common issues, helping owners identify and resolve problems efficiently. It covers a wide range of topics, including electrical system malfunctions, engine performance issues, and mechanical faults. The manual provides diagnostic charts and step-by-step instructions to help pinpoint the root cause of problems such as warning light illuminations, unusual noises, or reduced performance. Additionally, it offers guidance on addressing common concerns like faulty sensors, fluid leaks, and battery issues. Owners can also find recommendations for basic repairs and when to seek professional assistance. This section empowers drivers to tackle minor issues independently, saving time and reducing repair costs. By following the manual’s troubleshooting guide, Jeep Grand Cherokee owners can ensure their vehicle remains in optimal condition and maintain its reliability on and off the road.

Understanding the Instrument Cluster and Warning Lights

The 2004 Jeep Grand Cherokee Owners Manual provides a detailed explanation of the instrument cluster and warning lights, ensuring drivers can interpret vital vehicle information at a glance. The dashboard features a variety of indicators, including speed, RPM, fuel level, and temperature gauges, alongside warning lights for system malfunctions. The manual deciphers each light’s meaning, such as the “Check Engine” light, oil pressure warnings, and ABS indicators, enabling owners to respond appropriately to alerts. It also outlines the difference between critical warnings and informational messages, helping drivers prioritize actions. By understanding these symbols and their significance, owners can monitor their vehicle’s health effectively, prevent potential issues, and ensure safe operation. This section is crucial for maintaining driver awareness and prolonging the vehicle’s lifespan through timely interventions. The manual’s clear explanations make it easier for all users to comprehend and utilize this essential information.

Maintenance and Service Information

The 2004 Jeep Grand Cherokee Owners Manual provides detailed maintenance and service schedules, including oil changes, tire rotations, and fluid replacements, to keep your vehicle in optimal condition.

Routine Maintenance Requirements

The 2004 Jeep Grand Cherokee Owners Manual outlines essential routine maintenance tasks to ensure longevity and optimal performance. Regular oil changes, tire pressure checks, and fluid inspections are emphasized to prevent mechanical issues. The manual recommends following a structured service schedule, including intervals for air filter replacements and spark plug maintenance. Proper tire rotation patterns are also provided to maintain even tread wear and improve handling. Additionally, the guide advises on belt replacements and coolant checks to prevent overheating. Adhering to these maintenance routines helps sustain fuel efficiency, engine health, and overall vehicle reliability. By following the outlined procedures, owners can avoid costly repairs and ensure their Grand Cherokee runs smoothly for years.

Oil Change and Fluid Replacement Guidelines

The 2004 Jeep Grand Cherokee Owners Manual provides detailed instructions for oil changes and fluid replacements to ensure optimal vehicle performance. It recommends using the specified 5W-30 oil type for engine lubrication, with a capacity of approximately 6 quarts for most models. Regular oil changes are crucial to maintain engine health, with intervals suggested every 5,000 to 7,500 miles, depending on driving conditions. Additionally, the manual outlines procedures for checking and replacing other essential fluids, such as coolant, transmission, and brake fluids. Proper disposal of used oil and filters is emphasized to promote environmental responsibility. The guide also includes step-by-step instructions for locating drain plugs, using the correct tools, and refilling fluids to the recommended levels. By following these guidelines, owners can maintain their vehicle’s efficiency, prevent overheating, and extend the lifespan of critical components.

Tire Pressure and Rotation Recommendations

The 2004 Jeep Grand Cherokee Owners Manual emphasizes the importance of maintaining proper tire pressure and regular rotation for optimal performance, safety, and longevity. Tire pressure should be checked monthly and before long trips, with recommended levels specified in the manual (typically 32-40 PSI for most models). Under-inflation can lead to reduced fuel efficiency, uneven tire wear, and increased risk of tire failure. The manual recommends rotating tires every 8,000 to 12,000 miles to ensure even tread wear and extend tire life. Specific rotation patterns are provided for different driving conditions, such as rear-wheel drive and four-wheel drive models. Proper tire care also includes regular inspections for wear, damage, and alignment issues. Adhering to these guidelines helps maintain vehicle stability, improves handling, and ensures consistent traction on various terrain. Always refer to the manual for precise specifications tailored to your vehicle configuration.

Troubleshooting and Repair

The manual guides owners in diagnosing and resolving common issues, such as fault codes like P0132, offering step-by-step solutions and DIY repair advice to maintain vehicle health.

Common Problems and Solutions

The 2004 Jeep Grand Cherokee may experience issues like P0132 oxygen sensor codes, transmission problems, and electrical malfunctions. The manual provides detailed troubleshooting steps for these common issues, offering repair solutions such as replacing sensors, checking wiring, and addressing fluid leaks. DIY tips are included to help owners fix minor problems independently, reducing repair costs. Additionally, the manual covers how to reset fault codes and perform basic diagnostics using the instrument cluster. For more complex issues, it recommends consulting a certified technician. Regular maintenance, as outlined in the manual, can prevent many of these problems from occurring. By following the guidelines, owners can ensure their vehicle runs smoothly and efficiently. The solutions are presented in a clear, easy-to-follow manner, making it accessible for both novice and experienced drivers.

DIY Repair Tips and Tricks

The 2004 Jeep Grand Cherokee Owner’s Manual offers practical DIY repair tips to help owners tackle minor issues independently. It provides step-by-step guidance for tasks like oil changes, tire rotations, and basic troubleshooting. The manual emphasizes the importance of using genuine Jeep parts and tools to ensure safety and effectiveness. For common repairs, such as replacing air filters or checking fluid levels, detailed instructions are included. Additionally, the manual highlights essential tools to keep in the vehicle for emergency repairs. Online resources and forums are also recommended for further assistance. DIY enthusiasts can save money and gain confidence by following these tips. However, for complex repairs, consulting a professional is advised. By adhering to the manual’s guidelines, owners can maintain their vehicle’s performance and extend its lifespan. This section empowers drivers to take control of minor repairs, fostering a sense of self-reliance and familiarity with their Jeep.

Recalls and Technical Service Bulletins

This section provides critical information on recalls and technical service bulletins for the 2004 Jeep Grand Cherokee, ensuring owner awareness of safety updates and necessary repairs to maintain vehicle integrity.

Important Recall Information for 2004 Models

The 2004 Jeep Grand Cherokee has specific recalls addressing safety and operational issues. These include potential concerns with the vehicle’s electrical system, fuel system, and other components that could impact performance and safety. Owners are advised to check the National Highway Traffic Safety Administration (NHTSA) database for any outstanding recalls. Notifications began in March 2004, with DaimlerChrysler contacting owners to address these issues. It is crucial for owners to have their vehicles inspected and repaired by authorized dealers to ensure compliance and safety. The manual emphasizes the importance of adhering to recall notices to prevent potential hazards. Regular checks and timely responses to recalls are vital to maintaining the vehicle’s reliability and protecting occupants. Owners should contact DaimlerChrysler at 1-800-853-1403 for further assistance and to schedule necessary repairs.

Technical Service Bulletins and Updates

Technical Service Bulletins (TSBs) and updates for the 2004 Jeep Grand Cherokee provide critical information on resolving known issues and improving vehicle performance. These bulletins, issued by the manufacturer, address specific concerns such as engine, transmission, and electrical system improvements. They often include software updates, part replacements, or revised maintenance procedures to ensure optimal functionality and safety. TSBs are distinct from recalls but equally important, as they help owners avoid potential problems and enhance their driving experience. Owners can access these bulletins through authorized Jeep dealerships or online databases. Regularly reviewing TSBs ensures that your vehicle remains up-to-date with the latest manufacturer recommendations. By addressing these updates, owners can maintain their Grand Cherokee’s reliability and performance, ensuring it continues to deliver the rugged capability and comfort it is known for. Staying informed about TSBs is a proactive step in vehicle ownership.

Additional Resources

Explore online manuals, repair guides, and parts catalogs for the 2004 Jeep Grand Cherokee. These resources offer detailed instructions, DIY tips, and accessories to enhance your ownership experience.

Online Manuals and Guides

The 2004 Jeep Grand Cherokee owner’s manual and service manual are available for free in PDF format online. These resources provide detailed information on vehicle operation, maintenance, and troubleshooting. You can view or download the manual directly from reputable websites, ensuring access to accurate and official guidance. Additionally, online platforms offer repair manuals, parts catalogs, and technical service bulletins specific to the 2004 model year. These guides cover everything from routine maintenance to complex repairs, making them invaluable for DIY enthusiasts and professional mechanics alike. Whether you need to replace fluids, troubleshoot issues, or understand advanced features, these online resources offer comprehensive support. They are compatible with various models, including the Limited, Laredo, and Overland editions, ensuring all owners can benefit. The manuals are also searchable, allowing users to quickly find specific topics or procedures. This convenient access ensures that maintaining and repairing your Jeep Grand Cherokee is efficient and stress-free.

Jeep Grand Cherokee Repair Manuals

Jeep Grand Cherokee repair manuals for the 2004 model year are widely available online, offering detailed instructions for DIY repairs and professional mechanics. These manuals cover a broad range of topics, from routine maintenance to complex repairs, ensuring you can address any issue efficiently. Available in PDF format, they can be downloaded for free from various websites, including DepositFiles and other trusted sources. The repair manuals are comprehensive, covering engine repair, transmission service, electrical systems, and more. They are designed to be user-friendly, with clear diagrams and step-by-step guides. Whether you’re replacing brakes, fixing a faulty sensor, or performing an oil change, these manuals provide the necessary guidance. Additionally, they are compatible with multiple trim levels, including Laredo, Limited, and Overland models. By using these manuals, you can save money on repair costs and ensure your Jeep runs at its best. They are essential resources for anyone looking to maintain or repair their 2004 Jeep Grand Cherokee.

Parts Catalog and Accessories Information

The 2004 Jeep Grand Cherokee parts catalog provides detailed information on genuine and compatible accessories, ensuring your vehicle maintains its performance and authenticity. Available online, these catalogs include diagrams, part numbers, and descriptions for easy identification. Whether you’re searching for replacement parts or upgrading your SUV, the catalog offers a comprehensive guide to all components, from engine parts to interior accessories. Additionally, it covers accessories like roof racks, cargo carriers, and off-road equipment, tailored to enhance your Jeep’s functionality. Many websites, such as Jeep’s official site or trusted third-party sources, offer free downloads of these catalogs in PDF format. This resource is invaluable for both DIY enthusiasts and professional mechanics, ensuring you can find the right parts quickly and efficiently. By referencing the parts catalog, you can maintain your vehicle’s quality and performance, keeping it in optimal condition for years to come.

minolta x 700 manual

The Minolta X-700 manual is a comprehensive guide to mastering this iconic SLR camera. It details Programmed AE‚ aperture priority‚ and shutter priority modes‚ ensuring optimal photography. This essential resource helps photographers of all levels unlock the camera’s full potential‚ from basics to advanced functions.

1.1 Overview of the Minolta X-700 Camera

The Minolta X-700 is a highly regarded 35mm SLR camera known for its user-friendly design and advanced features. Part of the Minolta Program System‚ it offers Programmed AE‚ aperture priority‚ and manual modes‚ catering to both beginners and professionals. The camera features a built-in flash‚ self-timer‚ and compatibility with a wide range of lenses and accessories. Its intuitive controls and robust construction make it a versatile tool for various photography needs‚ ensuring precise control and creative freedom.

1.2 Importance of the Manual for Optimal Camera Usage

The manual is crucial for unlocking the full potential of the Minolta X-700. It provides detailed explanations of features like Programmed AE‚ aperture priority‚ and manual modes‚ ensuring users understand how to utilize each function effectively. The manual also covers maintenance tips‚ troubleshooting‚ and accessory compatibility‚ helping photographers maintain and optimize their camera. By following the guide‚ users can enhance their photography skills and extend the camera’s lifespan‚ making it an indispensable resource for achieving professional-quality results consistently.

Key Features of the Minolta X-700

The Minolta X-700 offers Programmed AE‚ aperture priority‚ shutter priority‚ and manual modes‚ along with advanced features like touch-switch metering‚ built-in flash‚ AE lock‚ and self-timer functionality.

2.1 Programmed Auto-Exposure (AE) Control

The Minolta X-700’s Programmed AE mode simplifies photography by automatically setting both aperture and shutter speed for optimal exposures. This feature is ideal for beginners and experienced photographers alike‚ offering ease of use while maintaining high-quality results. The camera continuously adjusts settings based on lighting conditions‚ ensuring versatility in various environments. The viewfinder displays LED indicators‚ providing real-time feedback on selected settings. This mode is a cornerstone of the X-700’s functionality‚ making it a reliable choice for capturing sharp‚ well-exposed images effortlessly.

2.2 Aperture Priority Mode

The Minolta X-700’s Aperture Priority Mode allows photographers to manually set the aperture‚ while the camera automatically adjusts the shutter speed for proper exposure. This mode is ideal for controlling depth of field‚ enabling creative decisions about subject focus and background blur. The manual aperture ring provides precise control‚ and the viewfinder’s LED indicators display the selected aperture and corresponding shutter speed. This feature is particularly useful for portrait and landscape photography‚ offering a balance between creative control and automated convenience for achieving professional-quality results.

2.3 Shutter Priority Mode

The Minolta X-700’s Shutter Priority Mode enables photographers to set a desired shutter speed manually‚ while the camera automatically adjusts the aperture for optimal exposure. This mode is ideal for capturing motion effects‚ such as freezing fast-moving subjects or creating artistic blur. By controlling shutter speed‚ users can achieve precise results in various lighting conditions. The viewfinder’s LED indicators display the selected shutter speed and corresponding aperture‚ ensuring accurate adjustments. This feature is particularly useful for sports‚ wildlife‚ and low-light photography‚ offering a balance between creative control and automated functionality for dynamic image capture.

2.4 Manual Mode for Full Creative Control

The Minolta X-700’s Manual Mode offers full creative control‚ allowing photographers to set both aperture and shutter speed independently. This mode is ideal for experienced users who want precise control over exposure. The camera’s metering system provides accurate guidance‚ with LED indicators in the viewfinder showing recommended settings. Manual Mode is perfect for achieving specific artistic effects‚ such as intentional overexposure or underexposure. It also enables the use of the AE Lock function for custom exposure adjustments‚ giving photographers unparalleled flexibility in capturing their vision. This mode is a cornerstone of the X-700’s versatility and creative potential.

How to Use the Minolta X-700

Mastering the Minolta X-700 involves understanding its intuitive controls and features. Start with initial setup‚ loading film‚ and basic handling. Use the viewfinder for accurate framing and focus. Familiarize yourself with metering modes and adjust settings as needed. Regularly refer to the manual for optimal performance and troubleshooting. Proper care ensures longevity and reliable operation‚ making the X-700 a trusted companion for photographers.

3.1 Initial Setup and Camera Preparation

Before using your Minolta X-700‚ carefully unpack and inspect the camera. Ensure all accessories‚ such as lenses and straps‚ are included. Attach the lens securely using the Minolta SR mount system. Adjust the diopter to suit your eyesight for clear viewfinder visibility. Familiarize yourself with the camera’s controls‚ including the mode dial‚ aperture ring‚ and shutter speed dial. Insert batteries correctly and test the metering system by pressing the touch-switch. Refer to the manual for specific instructions to ensure proper setup and functionality. Proper preparation ensures a smooth shooting experience and prevents damage.

3.2 Loading Film and Basic Camera Handling

Load film in a darkened environment or using a film changing bag to prevent exposure. Open the camera back by sliding the release latch. Attach the film leader to the take-up spool‚ ensuring proper alignment. Advance the film using the rapid rewind lever until it reaches the first frame marker. Close the back and press the touch-switch to activate the meter. Check the film counter to confirm loading. Handle the camera gently‚ avoiding direct sunlight on the lens to prevent damage. Always rewind film completely before removing it to avoid exposure.

3.3 Understanding the Viewfinder and LED Indicators

The viewfinder displays essential shooting information‚ including shutter speed‚ aperture‚ and exposure modes. LED indicators show programmed AE settings‚ metered manual mode‚ and AE lock status. The touch-switch metering system activates the LEDs for 15 seconds after pressing the shutter button. In Programmed AE‚ both aperture and shutter speed are displayed. In manual mode‚ the LEDs indicate over or under exposure. Use the viewfinder to monitor settings and ensure proper exposure. The LEDs provide real-time feedback‚ helping you adjust settings for optimal results. This feature enhances precision and control during photography.

Exposure Modes and Metering

The Minolta X-700 offers multiple exposure modes‚ including Programmed AE‚ Aperture Priority‚ Shutter Priority‚ and Manual Mode. The Touch-Switch Metering System provides precise control over exposure settings.

4.1 Programmed AE Mode Operation

The Programmed AE mode on the Minolta X-700 automatically sets both aperture and shutter speed for optimal exposure. This mode is ideal for beginners and professionals alike‚ offering simplicity while maintaining high image quality. The camera continuously adjusts settings based on lighting conditions‚ displayed via the viewfinder’s LED indicators. Users can also engage the AE Lock feature to hold specific meter readings‚ allowing for creative control over exposure. The Touch-Switch Metering System further enhances precision‚ ensuring accurate results in various lighting scenarios.

4.2 Metered Manual Mode for Precision Control

The Metered Manual Mode on the Minolta X-700 offers full creative control by allowing users to manually set both aperture and shutter speed. The camera’s built-in meter provides precise exposure readings‚ displayed via the viewfinder’s LED indicators. This mode is ideal for experienced photographers who prefer fine-tuning their settings. The X-700 also features a 2EV exposure adjustment range with LED indicators‚ enabling subtle adjustments for perfect results. This mode ensures ultimate precision and customization for achieving desired photographic effects.

4.3 AE Lock Function for Custom Exposure Adjustments

The AE Lock function on the Minolta X-700 allows photographers to capture custom exposure readings for specific parts of the frame. By pressing the AE Lock button‚ the camera locks the metered exposure‚ enabling precise control over lighting conditions. This feature is particularly useful for backlit or high-contrast scenes where manual adjustments are necessary. The locked exposure can then be combined with manual mode for further fine-tuning. The X-700 also offers a 2EV exposure adjustment range‚ indicated by LED markers‚ ensuring accurate and customizable results for every shot.

Advanced Features of the Minolta X-700

The Minolta X-700 features advanced capabilities such as Touch-Switch Metering‚ Built-In Flash‚ and Self-Timer. These enhancements provide improved functionality and precision for photographers seeking control and versatility.

5.1 Touch-Switch Metering System

The Minolta X-700’s Touch-Switch Metering System offers advanced exposure control. By touching the operating button‚ the system activates‚ keeping the viewfinder LEDs illuminated for 15 seconds. This feature ensures precise metering in various lighting conditions‚ allowing for accurate aperture and shutter speed adjustments. The system is part of the camera’s metering capabilities‚ providing photographers with enhanced control over exposure settings. Its intuitive design makes it easier to achieve desired results‚ especially in challenging lighting environments‚ while maintaining the camera’s overall functionality and user-friendly operation.

5.2 Built-In Flash and External Flash Compatibility

The Minolta X-700 features a built-in flash for convenient illumination in low-light conditions. With a guide number of 12 (at ISO 100)‚ it provides sufficient coverage for everyday photography. Additionally‚ the camera supports external flash units‚ such as the Auto Electroflash 280PX‚ offering more power and flexibility. The built-in flash simplifies operation‚ while external options enhance creative control‚ allowing photographers to achieve better lighting results in various scenarios. This compatibility ensures versatility for both casual and professional use‚ making the X-700 adaptable to diverse shooting environments and lighting needs.

5.3 Self-Timer Function for Delayed Shutter Release

The Minolta X-700’s self-timer function provides a 10-second delay between shutter release and exposure‚ minimizing camera shake and allowing photographers to be included in group shots. Activated via a dedicated button‚ the self-timer emits an audible beep and flashes an LED indicator to signal the countdown. This feature is ideal for avoiding blur caused by manual shutter pressing‚ ensuring sharp images even in low-light conditions. The self-timer enhances versatility‚ making it a valuable tool for photographers seeking precision and convenience in their work.

Maintenance and Care of the Minolta X-700

Regular cleaning of the camera and lens ensures optimal performance. Store the X-700 in a cool‚ dry place to prevent damage. Handle with care to maintain precision.

6.1 Cleaning the Camera and Lens

Regular cleaning is essential to maintain the Minolta X-700’s performance. Use a soft‚ dry cloth to wipe the camera body and lens. For the lens‚ employ a microfiber cloth or optical cleaning tissue to prevent scratches; Avoid harsh chemicals or abrasive materials. Gently remove dust or smudges to ensure clear optics and sharp images. Clean the viewfinder and mirrors with care‚ as they are sensitive components. Proper maintenance extends the camera’s lifespan and ensures optimal functionality for years of reliable use.

6.2 Storing the Camera Properly

Store the Minolta X-700 in a cool‚ dry place away from direct sunlight and moisture. Use the original case or a protective bag to prevent scratches and dust accumulation. Avoid extreme temperatures or humid environments‚ as they may damage internal components. Remove the battery when storing for extended periods to prevent corrosion. Keep the lens capped to protect it from dust and fingerprints. Proper storage ensures the camera remains in excellent condition‚ ready for use whenever needed. Always refer to the manual for specific storage recommendations to maintain its longevity.

6.3 Troubleshooting Common Issues

Common issues with the Minolta X-700 include metering inaccuracies‚ battery drain‚ or lens errors. Check the battery life and ensure proper installation. Clean the lens contacts and viewfinder for accurate metering; If the shutter fails to fire‚ inspect for obstructions or mechanical malfunctions. For persistent issues‚ consult the manual or seek professional repair. Regular maintenance and proper handling can prevent many problems‚ ensuring the camera functions optimally for years. Always refer to the troubleshooting guide in the manual for specific solutions to common challenges.

Accessories for the Minolta X-700

The Minolta X-700 supports a variety of accessories‚ including compatible lenses‚ flash units‚ and tripods‚ to enhance functionality and creativity. These tools expand the camera’s capabilities‚ ensuring versatility for photographers.

7.1 Compatible Lenses and Mounts

The Minolta X-700 uses the Minolta SR bayonet mount‚ ensuring compatibility with a wide range of lenses. Popular options include the MD series‚ offering exceptional optical quality. Zoom lenses like the MD Zoom 35-70mm and MD Zoom 70-210mm provide versatility for various photography needs. The camera also supports third-party lenses‚ making it a flexible choice for photographers. This compatibility allows users to experiment with different focal lengths and specialized optics‚ enhancing their creative possibilities and ensuring optimal performance across diverse shooting scenarios.

7.2 Flash Units and Lighting Accessories

The Minolta X-700 supports a range of flash units‚ including the built-in flash for convenience and external flash units like the Auto Electroflash 280PX for advanced lighting control. These accessories enhance low-light photography‚ offering precise illumination. The camera also works with Minolta’s dedicated flash systems‚ ensuring compatibility and optimal performance. Additional lighting accessories‚ such as diffusers and reflectors‚ can further refine your lighting setup‚ providing greater creative control and professional-grade results in various shooting conditions.

7.3 Tripods and Other Support Equipment

Tripods are essential for stabilizing the Minolta X-700‚ especially in low-light conditions or for precise compositions. The camera supports standard tripod mounts‚ ensuring compatibility with a variety of tripods and heads. Additional support equipment‚ such as monopods and quick-release plates‚ offers flexibility for photographers. These accessories enhance stability‚ allowing for sharper images and smoother camera movements. They are particularly useful for long exposures‚ macro photography‚ or when using heavy lenses‚ ensuring professional-grade results and ease of use in diverse shooting scenarios.

The Minolta Program System

The Minolta Program System seamlessly integrates the X-700 with compatible accessories‚ enhancing functionality and creativity. It streamlines camera operation‚ offering advanced features and compatibility with flashes‚ lenses‚ and more‚ ensuring versatile photography solutions.

8.1 Overview of the Minolta Program System

The Minolta Program System is an integrated photography ecosystem centered around the X-700. It combines advanced camera features with compatible accessories like lenses‚ flashes‚ and tripods‚ designed for seamless functionality. This system enhances creativity and efficiency‚ offering photographers a versatile toolkit. Key components include the Programmed AE mode‚ metered manual control‚ and accessories like the Auto Electroflash 280PX. The system ensures compatibility and optimal performance across all Minolta products‚ making it a robust solution for photographers seeking professional results. It emphasizes ease of use and adaptability‚ catering to both enthusiasts and professionals. The Program System underscores Minolta’s commitment to innovation and user-centric design‚ providing a comprehensive platform for diverse photographic needs. By integrating hardware and software‚ it streamlines workflows‚ allowing photographers to focus on capturing exceptional images. This modular approach ensures that users can expand their capabilities as they grow‚ making the Minolta Program System a cornerstone of the X-700 experience. It represents a holistic approach to photography‚ where every component works in harmony to deliver outstanding results.

8.2 Compatibility with Other Minolta Accessories

The Minolta X-700 seamlessly integrates with a wide range of Minolta accessories‚ enhancing its versatility. Compatible lenses‚ including the MD mount series‚ ensure optical excellence and adaptability. The camera also works with external flashes like the Auto Electroflash 280PX‚ providing advanced lighting control. Additionally‚ tripods and other support equipment are fully compatible‚ offering stability and precision. This compatibility allows photographers to expand their creative possibilities‚ leveraging Minolta’s ecosystem for enhanced functionality and professional-grade results. The system ensures effortless integration‚ making it a reliable choice for photographers seeking a comprehensive setup. Its modular design promotes flexibility‚ catering to diverse shooting needs and styles. By supporting a broad array of accessories‚ the X-700 empowers users to tailor their photography experience to achieve exceptional outcomes. This compatibility underscores Minolta’s dedication to creating a cohesive and expandable system for photographers. It ensures that every accessory works harmoniously with the camera‚ delivering consistent and high-quality performance. The X-700’s compatibility with Minolta accessories is a testament to its enduring appeal and practicality in the world of photography. With a wide range of compatible tools‚ photographers can explore new creative avenues and capture images with precision and ease. This seamless integration is a key feature of the Minolta Program System‚ designed to meet the evolving needs of photographers. Whether in the studio or on location‚ the X-700’s compatibility with Minolta accessories ensures a professional-grade experience. It is a camera built to grow with its user‚ offering endless possibilities for creative expression. The Minolta X-700’s compatibility with other Minolta accessories is a cornerstone of its design‚ providing photographers with a robust and adaptable system. This ensures that every accessory enhances the camera’s capabilities‚ delivering outstanding results in various photographic scenarios. The X-700’s compatibility is a reflection of Minolta’s commitment to innovation and user satisfaction‚ making it a beloved choice among photography enthusiasts and professionals alike. Its ability to integrate with a wide range of accessories ensures that photographers can always find the right tool for their needs‚ making the X-700 a timeless and reliable companion in the pursuit of photographic excellence.

Downloading and Using the Minolta X-700 Manual

The Minolta X-700 manual is readily available online in PDF format‚ offering detailed guidance on camera features‚ modes‚ and troubleshooting. Download from trusted sources for easy access.

9.1 Sources for the Official Minolta X-700 Manual

The official Minolta X-700 manual can be downloaded from trusted sources like ManualsBase‚ Mike Butkus’ camera manual library‚ and other reputable websites. These platforms offer high-quality PDF versions of the manual‚ ensuring easy access to detailed guides on camera features‚ operation modes‚ and troubleshooting. Additionally‚ some sites provide supplementary resources‚ such as repair manuals and user guides‚ to enhance your photography experience with the X-700.

9.2 Navigating the Manual for Specific Information

The Minolta X-700 manual is organized logically‚ making it easy to find specific information. Use the table of contents or index to locate sections on exposure modes‚ flash usage‚ or maintenance. Detailed descriptions of features like Programmed AE‚ aperture priority‚ and manual mode are provided‚ along with troubleshooting tips. The manual also includes diagrams and charts to explain complex functions. By using the PDF’s search function or bookmarks‚ users can quickly access guidance on topics such as metering systems‚ self-timer operations‚ and compatible accessories.

The Minolta X-700 manual empowers photographers to master its features‚ ensuring optimal performance and creative control. With proper care and practice‚ it remains a reliable tool for exceptional photography.

10.1 Final Tips for Getting the Most Out of the X-700

Mastering the Minolta X-700 requires understanding its features and practicing regularly. Familiarize yourself with the manual to explore all modes‚ from Programmed AE to Manual. Experiment with aperture and shutter priority for creative control. Keep the camera clean and store it properly to maintain performance. Use original Minolta accessories for compatibility and reliability. Don’t hesitate to try different lenses and flash units for versatility. Finally‚ take time to experiment and adjust settings to achieve the best results in various lighting conditions.

whistler radar detector manual

Whistler Radar Detector Manuals⁚ A Comprehensive Guide

This guide provides comprehensive information on accessing and utilizing Whistler radar detector manuals. Learn how to download manuals, find specific model instructions, and understand key features for optimal performance and safe driving.

Downloading Whistler Manuals

Numerous online resources offer Whistler radar detector manuals in PDF format. Websites like ManualsLib boast extensive collections, often exceeding 190 manuals for various models. These resources usually categorize manuals alphabetically by model, simplifying the search process. Directly accessing the manufacturer’s website, www.whistlergroup.com, is another excellent option. Check for a “Support” or “Downloads” section where you can find user manuals, owner’s guides, and sometimes even service manuals. Remember to specify your exact model number for accurate results. Once located, simply click the download link to obtain the PDF file. Ensure you have a PDF reader installed on your device (most computers and smartphones have one pre-installed). Save the downloaded manual for easy access whenever needed. This ensures you always have the necessary information at your fingertips, whether troubleshooting issues or learning advanced features. Always verify the authenticity of the download source to prevent downloading potentially malicious files.

Manual Availability and Accessibility

Whistler radar detector manuals are readily available through various channels, ensuring accessibility for all users. The manufacturer’s website, while a primary source, may not always contain every model’s manual. Third-party websites specializing in user manuals, like ManualsLib, often compile extensive collections, including those that might be missing from the official site. These sites usually offer free downloads in PDF format, allowing users to save a copy for offline access. The ease of access varies depending on the model and the specific website; some older models might be harder to find than newer ones. However, searching by model number usually yields quick results. Remember to double-check the authenticity of the source before downloading to avoid malware. The information within these manuals is usually comprehensive, covering setup, operation, troubleshooting, and advanced features, ensuring a smooth user experience. Consider bookmarking reliable sources for future reference, facilitating quick access whenever needed. This ensures you’ll always find the support you need, whether you’re a seasoned user or just starting out.

Finding Specific Model Manuals

Locating the correct manual for your specific Whistler radar detector model is crucial for optimal functionality. Begin by identifying your model’s exact name and number; this information is typically found on a label on the device itself or in its original packaging. Once you have this information, utilize online search engines to locate the manual. Use precise keywords, such as “Whistler [model number] user manual PDF,” to refine your search. Manufacturer websites are an excellent starting point. However, if the manual isn’t available there, explore dedicated user manual websites. These websites often categorize manuals alphabetically or numerically, simplifying the search process. If you encounter difficulties, consider contacting Whistler’s customer support directly. They might be able to provide a digital copy or direct you to a reliable source for your specific model. Remember that the manual is a valuable resource, guiding you through setup, operation, feature explanations, and troubleshooting common issues. Taking the time to find and understand your manual will ensure you gain the most from your Whistler radar detector.

Understanding Whistler Radar Detector Features

This section details the key features of Whistler radar detectors, including radar detection bands (X, K, Ka), laser detection capabilities, and the functionality of city/highway modes.

Radar Detection Bands (X, K, Ka)

Whistler radar detectors typically operate across multiple radar frequency bands⁚ X, K, and Ka. Understanding these bands is crucial for effective detection. The X band, an older frequency, is often used by older radar systems and may trigger false alarms from sources like automatic door openers. The K band is a more common frequency used in modern police radar, offering a balance between detection range and the potential for false alarms from civilian devices. The Ka band, a relatively newer and higher frequency, is becoming increasingly popular with law enforcement due to its shorter wavelength, making it less prone to interference but also more difficult for some detectors to detect at longer ranges. Many Whistler models offer sensitivity adjustments within these bands allowing users to fine-tune performance based on their environment. The ability to differentiate between these bands is a key feature, aiding in avoiding false alarms while ensuring timely alerts for genuine speed-monitoring radar signals. Consult your specific Whistler model’s manual for details on its band coverage and any specific tuning options.

Laser Detection Capabilities

Many Whistler radar detectors incorporate laser detection capabilities, offering a crucial layer of protection against laser speed guns. Laser guns, unlike radar, emit a focused beam of light, making them challenging to detect from a distance. Whistler’s laser detection systems employ advanced optical sensors to detect these beams. The detection range varies depending on the model and environmental factors such as weather conditions and the angle of the laser beam. A visual or audible alert typically indicates a laser signal, alerting the driver to potential speed enforcement. Some high-end Whistler models feature advanced laser detection technologies, such as rear laser detection, providing 360-degree coverage. This ensures the driver is alerted regardless of the direction from which the laser is emitted. Understanding the nuances of your Whistler’s laser detection system, as detailed in your user manual, is key to optimizing its effectiveness and ensuring prompt responses to laser speed gun deployments. Always refer to your specific model’s manual for its exact capabilities and limitations.

City/Highway Modes and Their Functionality

Whistler radar detectors often include selectable City and Highway modes to optimize performance in different driving environments. Highway mode prioritizes maximum detection range, ideal for open roads where long-range radar signals are more prevalent. This mode may result in more alerts from sources like automatic door openers or other devices sharing frequencies with police radar. In contrast, City mode filters out these extraneous signals, reducing false alarms in densely populated areas where such devices are more common. Some models offer multiple City modes (City 1, City 2, etc.), allowing for finer control over sensitivity and alert filtering. The choice between City and Highway mode depends on the driving environment; Highway mode is best for long stretches of open road, while City mode is more suitable for urban areas with potential for increased false alarms from non-police radar sources. Refer to your specific Whistler model’s manual for detailed instructions on selecting and using these modes effectively. Proper mode selection ensures optimal balance between alert sensitivity and minimizing false alarms.

Troubleshooting Common Issues

This section addresses common Whistler radar detector problems, including false alarms, understanding alert types (V/L), and accessing customer support for assistance with troubleshooting and resolving issues.

False Alarms and Their Causes

False alarms in Whistler radar detectors are a common frustration. Several factors can trigger these unwanted alerts. One frequent culprit is interference from sources like automatic door openers, intrusion alarms, or other devices operating on similar frequencies to police radar, often in the X band. These devices share frequencies with police radar, leading to false positives. Whistler’s City Mode helps mitigate this by filtering out weaker signals. Another cause is the presence of traffic monitoring systems or lane-change assistants found on some vehicles, often utilizing K-band frequencies. These systems emit radar signals that can be misinterpreted by the detector. Understanding the alert types displayed by your Whistler detector (V/L, etc.) is crucial for distinguishing between genuine radar signals and false alarms. Properly adjusting settings, such as selecting Highway or City mode, can significantly reduce the frequency of false alarms. Consult your manual for specific instructions on adjusting settings to minimize false alerts and optimize your detector’s performance. Remember that some level of false alarms might be unavoidable due to the nature of radar detection technology and the increasing number of devices using similar frequencies. If false alarms persist after adjustments, contact Whistler customer support for further assistance.

Understanding Alert Types and Meanings (V/L, etc.)

Whistler radar detectors utilize various alert types to indicate the nature of the detected signal. Understanding these alerts is key to interpreting the information correctly and reacting appropriately. A common alert is “V/L,” which signifies the detection of a laser signal. Laser guns are frequently used at short ranges, so a V/L alert indicates a potentially imminent threat. Other alerts might correspond to specific radar bands (X, K, Ka). The detector’s audio cues often complement the visual alerts, providing distinct sounds for each type of signal. The intensity of the alert—whether a single beep, multiple beeps, or a continuous tone—usually correlates to the strength of the detected signal. Stronger signals suggest a closer proximity to the source, such as a speed-detecting device. Your Whistler manual provides a detailed explanation of all alert types and their significance. Familiarity with these alerts enables drivers to interpret the warnings efficiently, allowing for timely and appropriate adjustments to driving behavior to maintain safety and avoid potential penalties. Refer to your specific model’s manual for precise descriptions of its unique alert system. Ignoring or misinterpreting alerts can compromise your safety and lead to unexpected consequences.

Customer Support and Contact Information

Experiencing difficulties with your Whistler radar detector? Don’t hesitate to utilize the available customer support resources. The Whistler Group provides various avenues for assistance, ensuring users receive prompt and effective solutions to their queries. Their website, www;whistlergroup.com, often houses FAQs, troubleshooting guides, and downloadable manuals. For direct assistance, consider contacting their customer service hotline; the provided number is typically listed in the user manual. Note that operating hours may vary; check your manual or the website for current contact details. Should you require further support or have a malfunctioning device, their customer return center address might be necessary for warranty claims or repairs. Remember to retain your purchase information, including proof of purchase and model number, when contacting support. Clear communication regarding the issue encountered will expedite the resolution process. Proactive troubleshooting, such as checking the power source or reviewing the manual’s troubleshooting section, can often resolve minor issues before contacting support. Remember that maintaining a record of your interactions with customer support can be beneficial for future reference.

Advanced Features and Settings

Explore advanced features like Pulse Protection, minimizing false alarms from short-range radar bursts. Understand the Safe Driving System (SWS) for hazard alerts and optimize City/Highway modes for reduced nuisance alerts.

Pulse Protection and its Importance

Pulse protection is a crucial feature in modern radar detectors, designed to combat the increasingly sophisticated “instant-on” or pulse radar technology employed by law enforcement. Unlike traditional radar that emits a continuous signal, pulse radar operates in short bursts, making it more difficult for standard detectors to identify. This makes pulse protection essential for comprehensive radar detection. The technology behind pulse protection varies among manufacturers, but generally involves advanced signal processing algorithms capable of detecting these brief radar pulses. By incorporating advanced signal processing techniques, these detectors can identify the characteristic pattern of these short bursts and issue an alert, providing drivers with crucial advance warning before a speed violation occurs. Effective pulse protection significantly enhances the overall effectiveness of a radar detector, ensuring reliable detection of both traditional and pulse radar signals. The importance of pulse protection cannot be overstated in today’s environment of increasingly advanced law enforcement radar systems. Investing in a radar detector with robust pulse protection capabilities is a prudent step towards enhancing road safety and avoiding potential speeding tickets.

Safe Driving System (SWS) Explanation

Whistler’s Safe Driving System (SWS) is a valuable feature designed to enhance driver awareness and promote safer driving practices. Unlike traditional radar detectors that primarily focus on law enforcement radar and laser signals, the SWS incorporates additional alerts to warn drivers of potential hazards on the road. This system goes beyond speed detection, providing an added layer of safety. The SWS often includes alerts for various safety-related signals, such as those emitted by emergency vehicles, construction zones, and other potential road hazards. By detecting these signals, the SWS provides drivers with timely warnings, giving them the opportunity to react appropriately and avoid potential accidents or dangerous situations. While specific features of the SWS may vary depending on the model of the Whistler radar detector, the core function remains the same⁚ to improve situational awareness and enhance overall road safety. The system’s alerts are typically distinct from radar and laser alerts, allowing for easy identification of different types of warnings. The SWS works in conjunction with the radar detection capabilities, offering a more comprehensive safety system for the driver.

Additional Features (e.g., City/City 1/City 2 Modes)

Many Whistler radar detectors offer selectable modes to optimize performance in various driving environments. City/City 1/City 2 modes are designed to minimize false alerts caused by sources like automatic door openers and other devices that operate on frequencies similar to police radar. These modes filter out weaker signals, reducing the number of nuisance alerts in urban areas while still maintaining sensitivity to genuine radar signals. Highway mode, conversely, maximizes sensitivity for open road driving where false alerts are less of a concern. The transition between modes is usually managed via a button on the device, allowing for quick adjustments based on driving conditions. Some models also feature customizable settings to fine-tune the sensitivity of these modes, allowing for personalized adjustment to individual preferences and local interference levels. Understanding and utilizing these modes can significantly enhance the user experience and prevent unnecessary distractions caused by false alerts. Refer to your specific model’s manual for detailed instructions on adjusting and utilizing these features to optimize performance in your area.

7 speed manual

The 7-speed manual transmission is an advanced system designed to optimize engine performance and efficiency, offering drivers enhanced control and a more engaging driving experience on today’s roads, improving acceleration.

Brief Overview of Manual Transmissions

Manual transmissions, often referred to as stick shifts, are a type of car part that lets the driver choose the car’s speed by shifting gears using a gear stick and clutch pedal, offering a direct mechanical connection between the engine and wheels. Unlike automatics, they require the driver to manually select gears, providing greater control over engine speed and power delivery. This direct control can translate to a more engaging driving experience, favored by enthusiasts.

However, manual transmissions demand more skill and coordination compared to automatic transmissions. Mastering the art of shifting gears smoothly, coordinating clutch engagement, and managing engine speed can be challenging for novice drivers. Despite the learning curve, many drivers appreciate the enhanced control and connection with the vehicle that manual transmissions provide, offering a raw and unfiltered driving experience. Manual transmissions also typically offer superior fuel efficiency compared to automatics due to the direct mechanical connection.

Advantages of 7-Speed Manual Transmissions

A 7-speed manual transmission provides improved acceleration, keeping the engine in the optimal power band. Increased fuel economy is also achievable by selecting the most efficient gear ratio to current conditions.

Improved Acceleration

The primary advantage of a 7-speed manual transmission lies in its ability to enhance vehicle acceleration. This improvement stems from having more gear ratios available to the driver, allowing them to keep the engine operating within its optimal power band. By selecting the appropriate gear for any given situation, the driver can maximize torque output, resulting in quicker and more responsive acceleration.

This is particularly beneficial during overtaking maneuvers or when merging onto highways, providing the driver with the confidence to accelerate swiftly and safely. The closer gear ratios also reduce the drop in engine speed between shifts, maintaining momentum and contributing to a smoother, more continuous acceleration experience, better performance.

Enhanced Fuel Efficiency

Beyond improved acceleration, a 7-speed manual transmission can also contribute to enhanced fuel efficiency. The increased number of gear ratios allows for a more precise matching of engine speed to vehicle speed, enabling the driver to select the most efficient gear for the current driving conditions.

Specifically, the taller gear ratios available in a 7-speed transmission can allow the engine to operate at lower RPMs while cruising at highway speeds, reducing fuel consumption and minimizing emissions. This is particularly advantageous during long-distance driving, where maintaining a consistent speed can significantly impact fuel economy. By optimizing engine operation, the 7-speed manual transmission helps drivers save fuel.

Disadvantages of 7-Speed Manual Transmissions

While offering several benefits, 7-speed manual transmissions also come with potential drawbacks, including increased complexity and cost, which can impact both the manufacturing process and driver experience on the road.

Increased Complexity and Cost

The intricate design of a 7-speed manual transmission inherently leads to greater complexity compared to transmissions with fewer gears. This complexity translates directly into higher manufacturing costs, impacting the final price of vehicles equipped with this advanced system. The increased number of components and tighter tolerances require more sophisticated engineering and production processes.

Furthermore, the specialized knowledge and equipment needed for maintenance and repairs contribute to the overall cost of ownership. Finding qualified technicians capable of servicing these transmissions can be more challenging, potentially leading to higher labor rates. This complexity affects not only the initial purchase but also the long-term expenses associated with owning a vehicle with a 7-speed manual transmission.

Steeper Learning Curve

Mastering a 7-speed manual transmission presents a steeper learning curve compared to transmissions with fewer gears. The increased number of gears requires drivers to develop a heightened sense of timing and coordination to execute smooth and efficient shifts. New drivers may find it challenging to adapt to the shorter gear ratios and the need for more frequent shifting.

The precise clutch control and throttle modulation necessary for optimal performance can take time and practice to perfect. Stalling the engine or experiencing jerky shifts are common occurrences for beginners. The added complexity can be daunting for those accustomed to simpler manual transmissions or automatic vehicles, demanding a greater commitment to learning and adaptation.

Comparison with Other Transmissions

The 7-speed manual transmission stands out with its unique balance of performance and efficiency. It is crucial to compare it against other transmission types to understand its specific advantages and disadvantages in various driving scenarios.

7-Speed Manual vs. 6-Speed Manual

Comparing a 7-speed manual transmission to a 6-speed variant reveals distinct performance and efficiency trade-offs. The addition of an extra gear in the 7-speed allows for finer-tuned gear ratios. These ratios can optimize engine performance across a wider range of speeds. This usually translates to slightly improved acceleration and enhanced fuel economy, especially at highway speeds.

However, the increased complexity of the 7-speed can lead to a steeper learning curve for drivers. The need to manage an additional gear shift requires greater coordination and skill. Furthermore, the 7-speed transmission often comes with a higher initial cost and potential maintenance expenses. The choice between a 6-speed and a 7-speed often depends on driving preferences and priorities. Drivers should consider whether the added complexity and cost are justified by the potential gains in performance and efficiency.

Driving Experience

The driving experience with a 7-speed manual transmission provides a greater sense of connection. Drivers experience enhanced engine control, allowing for precise gear selection and optimal power delivery on the open road today.

Enhanced Engine Control

One of the primary benefits of a 7-speed manual transmission is the enhanced level of engine control it offers to the driver, especially when compared to an automatic transmission system. With a manual transmission, drivers have direct command over gear selection, enabling them to precisely match engine output to driving conditions. This direct connection allows for optimal power delivery, whether accelerating, decelerating, or navigating challenging terrain. The ability to choose the precise gear provides a more engaging and responsive driving experience, particularly for enthusiasts who enjoy feeling connected to their vehicle. Drivers can also maximize fuel efficiency by selecting the most appropriate gear for the current speed and load, leading to potential savings at the pump. The tactile feedback and direct control contribute to a more immersive and rewarding driving experience, enhancing the overall enjoyment of the road.

citizen eco drive wr200 manual pdf

Citizen Eco-Drive WR200 Manual PDF⁚ Finding Your Guide

Finding your Citizen Eco-Drive WR200 manual is easy! Utilize the model and caliber numbers located on the watch’s caseback to pinpoint the precise instruction guide. Many online resources offer these manuals for download in PDF format.

Locating the Correct Manual

To find your Citizen Eco-Drive WR200 manual, begin by carefully examining your watch. The caseback, usually located on the underside, contains crucial identification information⁚ the model number and the caliber number. These alphanumeric codes are essential for locating the correct instruction manual. Don’t confuse these numbers; they are distinct identifiers. The model number is a broader classification, while the caliber number specifies the watch’s internal mechanism. Armed with these numbers, you can confidently begin your search. Many online retailers and Citizen’s official website provide a search function where you can input these numbers to directly access the PDF version of your watch’s manual. Alternatively, if you’ve purchased the watch from a physical store, inquire with their customer service department; they may have physical copies or digital links to the manual.

Using Model and Caliber Numbers

Your Citizen Eco-Drive WR200’s model and caliber numbers are key to finding the right manual; These numbers, usually found engraved on the watch’s caseback, are unique identifiers. The model number provides a general classification of your watch within Citizen’s product line; it’s often a longer alphanumeric string. The caliber number, however, is more specific, denoting the precise movement mechanism inside your watch. This number is crucial for locating the exact instruction manual, as variations in internal components might lead to differences in functionality and settings. When searching online for your manual, use both numbers for the most accurate results. Many websites dedicated to watch manuals allow you to search using either or both of these identifiers. Ensure you are correctly transcribing the numbers, as even a single incorrect digit could lead you to an incompatible manual. Accurate input is essential to a successful search.

Online Resources for Manuals

Numerous online platforms offer Citizen watch manuals, including the sought-after Citizen Eco-Drive WR200 manual. The official Citizen website is an excellent starting point; their support section often features a downloadable manual library. Alternatively, many independent watch enthusiast websites and forums act as repositories for various watch manuals, including those for Citizen models. These community-driven sites often have users who have scanned and uploaded their own manuals, making them readily accessible. Search engines, such as Google, Bing, or DuckDuckGo, are helpful tools, but remember to use precise search terms like “Citizen Eco-Drive WR200 manual PDF” to refine results. Be cautious of unofficial sources and ensure the downloaded file is from a trustworthy website to avoid malware or inaccuracies. Remember to always verify the authenticity of any downloaded manual by checking for consistency with your watch’s features and specifications.

Troubleshooting Your Citizen Eco-Drive WR200

Experiencing issues with your Citizen Eco-Drive WR200? This section offers solutions for common problems, addressing battery charging, power reserve, and understanding its 200-meter water resistance.

Common Issues and Solutions

Many users report that their Citizen Eco-Drive WR200 watch stops working. This is often due to insufficient power reserve. Exposure to direct sunlight or bright artificial light will recharge the watch’s battery. The charging time varies depending on the model and light intensity; consult your manual for specifics. Another common issue is difficulty setting the time and date. If the crown is not properly pulled out to the time-setting position, adjustments won’t register. Always refer to your manual’s instructions for precise steps. If the watch is consistently losing or gaining time, even after a full charge, it might require professional servicing. Citizen’s customer service can offer guidance or refer you to an authorized repair center for diagnostics and repairs. Remember to check the water resistance rating (WR200) before submerging the watch; exceeding this depth could cause damage. Finally, if the watch displays an unusual behavior, refer to the troubleshooting section of your manual or contact Citizen support.

Battery Charging and Power Reserve

The Citizen Eco-Drive WR200 utilizes light to power its battery, eliminating the need for traditional battery replacements. The watch’s power reserve, or the length of time it can operate without light exposure, varies depending on the model and usage. Generally, it ranges from 6 months to 180 days. To maximize battery life, ensure adequate exposure to sunlight or bright indoor lighting. If the watch stops functioning, it likely needs recharging. Place it in direct sunlight for several hours to restore power. The charging time depends on the light intensity and the watch’s current power level. The manual will specify the typical charging time. Avoid exposing the watch to extreme temperatures, as this can affect battery performance. If the watch consistently fails to charge even with sufficient light exposure, it may indicate a problem with the charging mechanism or the battery itself. Contact Citizen customer support or an authorized service center for diagnosis and repair.

Water Resistance (WR200) Understanding

The WR200 designation on your Citizen Eco-Drive indicates a water resistance rating of 20 atmospheres, or approximately 200 meters. This signifies the watch’s ability to withstand water pressure at that depth. However, this rating doesn’t guarantee its performance under all conditions. Factors like temperature changes, impacts, and the watch’s age can affect its water resistance. Avoid wearing the watch while showering, swimming in hot tubs, or engaging in high-impact water sports such as diving. Exposure to salt water or chemicals can damage the seals over time. Regular inspection of the seals and crown is recommended. Always consult your watch’s manual for detailed instructions on maintaining water resistance. Remember, the WR rating is a guideline, not an absolute guarantee against water damage. If you suspect any compromise to the watch’s water resistance, take it to a professional for inspection before further water exposure to avoid potential damage to the movement.

Setting Time and Date on Your Citizen Eco-Drive

This section details how to adjust the time and date on your Citizen Eco-Drive watch, including manual adjustments and utilizing video tutorials for guidance. Consult your manual for specific instructions.

Manual Adjustment Instructions

To manually set the time and date on your Citizen Eco-Drive WR200, locate the crown on the side of your watch. Usually, pulling the crown out to the first position allows you to adjust the time. Rotating the crown clockwise will advance the hands. Pulling the crown out to the second position often enables date adjustment; rotate to change the day and date. The specific number of clicks and the direction of rotation may vary depending on your exact model. Always refer to your watch’s specific instruction manual for detailed, model-specific steps, diagrams, and illustrations to avoid any accidental damage to the internal mechanism. Incorrect manipulation of the crown could affect the watch’s accuracy or even damage the delicate components. Take your time, and carefully follow the instructions provided in the manual. If you encounter any difficulties or if you’re unsure about any step, it’s best to consult a professional watch technician to avoid causing any damage. Remember, patience and careful attention to detail are key to successfully adjusting your Citizen Eco-Drive WR200 timepiece.

Video Tutorials and Guides

Supplementing your Citizen Eco-Drive WR200 manual, numerous video tutorials are available online. These visual guides often provide a clearer understanding of the time-setting process, especially for those who find written instructions challenging. Searching platforms like YouTube for “Citizen Eco-Drive WR200 time setting” or similar keywords will yield a range of helpful videos. Many tutorials demonstrate the process step-by-step, showing the crown manipulation and highlighting crucial points to ensure successful adjustment. These videos can be particularly beneficial for users unfamiliar with manual watch adjustments. Look for high-quality videos from reputable sources to guarantee accurate information. Remember to always cross-reference the information in the video with your watch’s specific manual, as slight variations in models may exist. By combining the written instructions with a visual demonstration, you can confidently and accurately set the time and date on your Citizen Eco-Drive WR200. Don’t hesitate to explore multiple videos to find one that best suits your learning style.

Perpetual Calendar Setting

Many Citizen Eco-Drive watches, including some WR200 models, boast a perpetual calendar function. This sophisticated feature automatically adjusts for varying month lengths, including February’s leap year adjustments, eliminating the need for manual date corrections for many years. Setting up the perpetual calendar often requires a specific sequence of crown pulls and rotations, as detailed in your watch’s manual; Consult the instruction booklet carefully, paying close attention to the diagrams and step-by-step instructions. Incorrect manipulation could lead to inaccurate date displays or even damage the watch’s internal mechanism. If your manual lacks clarity or if you encounter difficulties, online resources such as video tutorials or manufacturer support websites may offer additional guidance. Remember to accurately input the current date and time initially to ensure the perpetual calendar functions correctly. Accurate initial settings are vital for the long-term accuracy of this convenient feature. Always refer to your specific watch model’s manual for precise instructions, as variations may exist across different Citizen Eco-Drive models.

Citizen Eco-Drive Technology Explained

Citizen’s Eco-Drive technology harnesses light, converting it into energy to power your watch. This eliminates the need for battery replacements, offering a sustainable and convenient timekeeping solution.

Eco-Drive Function and Operation

The Citizen Eco-Drive system is remarkably efficient. It uses a small solar cell integrated into the watch dial to convert both natural and artificial light into electrical energy. This energy is then stored in a rechargeable battery, powering the watch’s functions. The charging process is continuous and passive; you don’t need to actively charge the watch. Exposure to any light source, whether sunlight or indoor lighting, will gradually replenish the battery’s power reserve. The watch will continue to function even in low-light conditions, drawing upon the stored energy. However, prolonged periods without any light exposure might eventually deplete the battery, causing the watch to stop. In such cases, simply expose the watch to a light source to resume normal operation. The time required to fully recharge the battery varies depending on the model and the intensity of the light source. Consult your watch’s manual for specific details regarding charging times and power reserve estimates for your specific Citizen Eco-Drive model.

Radio Controlled Timekeeping (if applicable)

Some Citizen Eco-Drive watches incorporate radio-controlled timekeeping technology, offering exceptional accuracy. This feature allows the watch to automatically synchronize its time with atomic clocks around the world, eliminating the need for manual adjustments. The watch receives a radio signal from one of several transmitting stations, depending on its geographical location. These signals broadcast highly precise time information, ensuring your watch always displays the correct time. The reception of these signals can be influenced by factors such as geographical location, obstructions (buildings, mountains), and atmospheric conditions. If your watch is not receiving a signal, it may still function normally using its battery-powered quartz movement, but it will not automatically update the time. Refer to your watch’s manual for troubleshooting advice should you encounter difficulties with the radio-controlled timekeeping function. This might involve checking the watch’s location, ensuring sufficient exposure to light to maintain power, and understanding the signal reception capabilities in your specific region.

wh32ux9019 manual pdf

Westinghouse WH32UX9019 Manual⁚ Key Information

The Westinghouse WH32UX9019 manual, available in PDF format, provides essential information for setup, usage, and troubleshooting. It covers specifications, features, and answers frequently asked questions. The manual is readily accessible online and is often accompanied by user reviews and support resources. Multiple online sources offer free downloads of this 12-page document in English.

Manual Availability and Download

Obtaining the Westinghouse WH32UX9019 user manual is straightforward. Numerous online platforms host the PDF version, freely available for download. A quick web search using the model number typically yields several links to download the manual directly. These sources often include user review sections, allowing potential buyers to gauge user experiences before purchasing. The file size usually ranges around 3 MB, ensuring quick download times even with slower internet connections. Remember to verify the authenticity of the download source before proceeding to avoid potential malware. Some websites also provide the option to view the manual online, eliminating the need for a download. This online viewing option allows for convenient access without consuming local storage space. Always check the file’s language before downloading, ensuring it’s in English, to avoid compatibility issues.

Specifications and Features

The Westinghouse WH32UX9019 manual details key specifications, highlighting its 32-inch display with a stunning 3840 x 2160 (4K) Ultra HD resolution. This ensures crisp, clear visuals for both work and entertainment. Connectivity options are a crucial aspect covered in the manual, specifying the inclusion of multiple HDMI ports and a DisplayPort for versatile device connections. Users will find information on the refresh rate (likely 60Hz), response time, and contrast ratio, all critical for evaluating image quality. Furthermore, the manual often highlights features designed to enhance user experience, such as “Flicker-Free” technology to reduce eye strain and a “Low Blue Light” filter to minimize blue light emission, promoting comfortable viewing sessions. The ergonomic design aspects, stand adjustability, and VESA mount compatibility are also often detailed. The manual’s comprehensive specifications section allows users to fully understand the monitor’s capabilities before purchase or setup.

Model Variations (WM27PX9019, WM32DX9019)

While the Westinghouse WH32UX9019 is the primary focus, the associated manuals often include information on closely related models. The WM27PX9019 and WM32DX9019 are frequently mentioned alongside the WH32UX9019, suggesting a product family sharing similar design elements, features, and potentially even internal components. The WH32UX9019 manual might not delve deeply into the specifics of these variations, but it may offer a comparison table highlighting differences in screen size (27-inch for WM27PX9019 and 32-inch for both WH32UX9019 and WM32DX9019), resolution, or other minor specifications. The extent of this comparative information varies depending on the manual version. Users seeking detailed differences between these models should consult individual manuals for each variant or contact Westinghouse support for clarification. Understanding these model relationships is crucial for users searching for compatible parts or accessories.

Accessing the WH32UX9019 User Manual

The WH32UX9019 user manual is readily available online. Numerous websites offer free PDF downloads or online viewing options. Alternative sources include the Westinghouse website and various manual aggregation sites.

Online Viewing Options

Several websites provide online viewing options for the Westinghouse WH32UX9019 user manual. This eliminates the need for a download, offering immediate access to the information. These online versions often allow for easy navigation and searching within the document, facilitating quick access to specific sections. Features such as zooming and page rotation can enhance the reading experience. While convenient, the online viewing approach relies on a stable internet connection. If your connection is interrupted, you may lose your place or be unable to access the manual entirely. Consider downloading a local copy for offline access to ensure uninterrupted reading. Some websites may have limitations on the number of pages displayed simultaneously or may include advertising. Always verify the source’s reliability before using the online manual to ensure accuracy and prevent potential malware exposure.

PDF Download Links

Direct PDF download links for the Westinghouse WH32UX9019 manual are frequently available from various online sources. These links typically lead to a downloadable file, usually a PDF, containing the complete user manual. Downloading a PDF allows for offline access, eliminating the need for an internet connection to view the manual. This is particularly helpful for troubleshooting issues when internet access might be unavailable. PDF files are generally compatible with a wide range of devices, including computers, tablets, and smartphones, ensuring accessibility from multiple platforms. However, be cautious when downloading files from unfamiliar websites, as some may contain malware. Always verify the source’s reputation and legitimacy before downloading. Once downloaded, the PDF can be saved locally for convenient and repeated access, ensuring the manual remains readily available whenever needed. The file size of the downloaded manual is typically around 3MB.

Alternative Sources for Manuals

If the primary online sources for the Westinghouse WH32UX9019 manual prove inaccessible or unreliable, several alternative avenues exist for obtaining this crucial document. Checking the official Westinghouse website’s support section is a good starting point. Many manufacturers host their product manuals directly on their websites, organized by product model numbers. Community forums dedicated to electronics or Westinghouse products can also be valuable resources. Users often share links or upload copies of manuals they possess, creating a collaborative support network. Retailers where the monitor was purchased may also have access to the manual, either in digital or physical form. Contacting customer support at the retailer could yield a copy. Finally, consider searching online document repositories and manual aggregation websites. These websites often compile user manuals from various manufacturers, making it easier to find less common or older product documentation. Remember to always verify the authenticity of any downloaded manual before use.

Technical Specifications of the WH32UX9019

The Westinghouse WH32UX9019 boasts a 3840 x 2160 (4K) resolution. Connectivity includes HDMI and DisplayPort. Additional features often cited are flicker-free technology and a low blue light filter for enhanced viewing comfort.

Screen Resolution and Size

The Westinghouse WH32UX9019 manual highlights a key specification⁚ its impressive 32-inch screen size. This generous display area provides ample room for multitasking, immersing you in visuals whether you’re working, gaming, or streaming. Paired with this expansive screen is a sharp 4K Ultra HD resolution (3840 x 2160 pixels). This high pixel density results in incredibly detailed images, with crisp text and vibrant colors that bring your content to life. The manual likely details how this resolution contributes to a superior viewing experience, emphasizing the clarity and sharpness that surpasses standard HD displays. Expect the manual to showcase the benefits of this large screen size and high resolution for various applications, from graphic design to video editing, ensuring users fully appreciate the visual capabilities of the WH32UX9019 monitor. Prepare to be captivated by the stunning visual fidelity and the expansive viewing area.

Connectivity Options (HDMI, DisplayPort)

The Westinghouse WH32UX9019 manual details its robust connectivity options, ensuring seamless integration with various devices. A prominent feature is the inclusion of multiple HDMI ports. These ports allow for easy connection to a wide range of devices, including laptops, gaming consoles, Blu-ray players, and more. The manual likely explains how to optimize these connections for the best picture quality and performance. Furthermore, the presence of a DisplayPort adds another layer of versatility. This connection type is known for its ability to support high resolutions and refresh rates, making it ideal for demanding applications like gaming and video editing. The manual may illustrate how to leverage DisplayPort’s capabilities for a smoother, more responsive visual experience. By outlining the specifics of both HDMI and DisplayPort functionality, the manual empowers users to fully harness the WH32UX9019’s connectivity for a versatile and high-performance setup.

Other Features (Flicker-Free, Low Blue Light)

The Westinghouse WH32UX9019 manual highlights its user-centric features designed for enhanced comfort and eye protection during extended viewing sessions. A key feature is the flicker-free technology, which minimizes screen flickering to reduce eye strain and fatigue. The manual likely explains how this technology works and its benefits for reducing headaches and improving overall viewing comfort. Additionally, the WH32UX9019 incorporates a low blue light filter. This feature reduces the emission of blue light, a type of light known to interfere with sleep patterns and cause eye discomfort. The manual might detail the different settings or modes available for adjusting the blue light filter intensity, allowing users to customize their viewing experience based on their preferences and environmental conditions. By emphasizing these features, the manual underscores Westinghouse’s commitment to user well-being and providing a comfortable viewing experience, even during prolonged use.

Troubleshooting and FAQs

The WH32UX9019 manual’s troubleshooting section addresses common issues and provides solutions. It also directs users to Westinghouse support channels for further assistance if needed.

Common Issues and Solutions

The Westinghouse WH32UX9019 user manual typically includes a dedicated troubleshooting section addressing frequently encountered problems. This section aims to empower users to resolve minor issues independently, minimizing the need for external support. Common problems often covered include connectivity issues, such as difficulties establishing a connection with a computer or other devices via HDMI or DisplayPort. The manual might provide step-by-step instructions for verifying cable connections, checking input sources, and restarting devices to resolve connectivity problems. Display-related issues are also addressed, for instance, blurry images, incorrect color settings, or flickering. Solutions may include adjusting screen settings, checking for loose connections, or ensuring the monitor’s power supply is correctly functioning. Power-related problems, such as the monitor not powering on, could be addressed by verifying the power cord and wall outlet. The manual may even include basic diagnostic steps for such issues.

Where to Find Support

Beyond the troubleshooting guide within the WH32UX9019 manual itself, Westinghouse offers several avenues for obtaining additional assistance. Their official website often features a dedicated support section with FAQs, downloadable resources, and contact information. This online support portal may contain updated drivers, firmware, and troubleshooting guides not included in the initial manual, ensuring users have access to the latest information. Many online forums and communities dedicated to electronics or Westinghouse products specifically provide platforms for users to connect, share experiences, and seek assistance from fellow owners or knowledgeable individuals. These forums can be invaluable resources for resolving uncommon issues or finding workarounds for specific problems. In addition to online resources, the manual may include contact details for Westinghouse customer service, providing an opportunity to speak directly with a representative for personalized assistance. This direct line of communication can be particularly helpful for complex or persistent problems.

Contacting Westinghouse

While the WH32UX9019 manual might offer initial contact details, locating the most up-to-date information is crucial. Westinghouse’s official website is the primary resource for current contact information, often featuring a dedicated support page with phone numbers, email addresses, and possibly even a live chat option. Before contacting them, it’s advisable to gather relevant information such as your monitor’s serial number, the specific issue you’re experiencing, and any troubleshooting steps you’ve already attempted. This will help streamline the process and allow for a more efficient resolution. Some online resources may list additional contact methods, such as social media channels or postal addresses, but always verify their authenticity through the official Westinghouse website to avoid misinformation. Remember to check for business hours and potential regional variations in contact methods, as support channels might differ depending on your location. A well-documented problem, along with readily available information, will ensure a faster and more effective interaction with Westinghouse support.

frigidaire oven manual

Frigidaire Oven Manuals⁚ A Comprehensive Guide

This guide provides essential information on locating and using your Frigidaire oven manual. Discover how to access online manuals, understand your model, and troubleshoot common issues. Learn about setting temperatures, self-cleaning cycles, and safety precautions for optimal performance and longevity.

Locating Your Frigidaire Oven Manual

Your Frigidaire oven’s manual is typically included within the appliance packaging upon purchase. Check the box thoroughly; it might be tucked inside a separate compartment or nestled amongst other paperwork. If you’ve discarded the packaging, you can explore several alternative methods. First, consult the Frigidaire website; their support section often hosts a downloadable library of manuals, searchable by model number. Your model number, usually a combination of letters and numbers, is typically found on a sticker affixed to the inside of the oven door. Alternatively, contact Frigidaire’s customer service directly; they can assist in locating the correct manual for your specific appliance, either by providing a digital copy or guiding you to a retail location that may stock printed versions. Remember to have your model number ready when contacting customer support for a faster and more efficient resolution.

Accessing Online Manuals

Accessing your Frigidaire oven manual online is a straightforward process. Begin by visiting the official Frigidaire website. Navigate to their support or customer service section, usually found via a prominent link on the homepage. Look for a search bar or a dedicated section for manuals or user guides. You’ll need your oven’s model number, located on a sticker inside the oven door or on the appliance’s exterior. Enter this number into the search bar, and the website should display your manual as a downloadable PDF file. If you encounter difficulties locating your specific model, utilize the website’s contact information or live chat feature to request assistance. Alternatively, utilize a general online search engine like Google, Bing, or DuckDuckGo. Search using keywords such as “Frigidaire oven manual” coupled with your specific model number. This approach may lead you to other websites hosting manuals, but always verify the source’s authenticity to ensure you are downloading a legitimate document.

Understanding Your Frigidaire Oven Model

Knowing your Frigidaire oven’s model number is crucial for accessing the correct manual and troubleshooting issues effectively. This number, typically a combination of letters and numbers, is usually found on a sticker located inside the oven door or on the oven’s exterior. Take a moment to locate this sticker; it’s often near the bottom or on the side of the oven. Carefully record the model number, as you’ll need it to search for your specific manual online or to contact Frigidaire customer support for assistance. Understanding your oven’s model number allows you to find specific instructions tailored to its features. Different models might have unique functionalities, such as different self-cleaning cycles, baking settings, or control panel configurations. Having this information readily available will streamline the process of using your oven and will aid in resolving any problems you may encounter, ensuring a smoother and more satisfying cooking experience. Remember to keep the model number in a safe place for future reference.

Using Your Frigidaire Oven⁚ Essential Instructions

This section details essential operating instructions for your Frigidaire oven, ensuring safe and efficient use. Consult your specific model’s manual for detailed guidance on all features and functions;

Setting the Oven Temperature

Accurately setting your Frigidaire oven’s temperature is crucial for successful baking and cooking. Most models feature a control panel with a digital display and buttons or a dial for temperature selection. Begin by preheating the oven to the desired temperature, allowing sufficient time for it to reach the set point before placing food inside. Refer to your specific model’s manual for precise instructions on preheating times and temperature adjustments, as these can vary depending on the oven’s capacity and features. Remember, oven temperatures can fluctuate slightly, so using an oven thermometer can enhance accuracy. Always ensure the oven door is securely closed during preheating and cooking to maintain consistent temperature. Incorrect temperature settings can lead to undercooked or overcooked food, so always double-check before starting the cooking process. Proper temperature control contributes to perfect results every time.

Self-Cleaning Cycle Instructions

Many Frigidaire ovens include a convenient self-cleaning cycle to simplify maintenance. Before initiating this cycle, remove any excess food spills or crumbs from the oven cavity. Consult your owner’s manual for specific instructions on your model, as procedures may differ. Generally, you’ll select the self-clean option on the control panel, then choose the cleaning duration – typically ranging from one to three hours. The oven will heat to a high temperature, burning off residue. After the cycle completes, allow the oven to cool completely before wiping away any remaining ash with a damp cloth. Important safety precautions include ensuring adequate ventilation during the self-cleaning process and keeping children and pets away from the hot oven. Never use harsh abrasive cleaners or scouring pads inside the oven. Regular use of the self-clean function helps maintain your Frigidaire oven’s cleanliness and efficiency, extending its lifespan.

Manual Ignition of Oven Burner (if applicable)

Some Frigidaire oven models may require manual ignition of the oven burner. This typically involves a process that differs from electric ovens, which rely on electric heating elements. Before attempting manual ignition, carefully review the instructions in your specific model’s user manual. Improper procedures can be dangerous. Generally, manual ignition involves opening the oven door, locating the burner’s ignition source (often a small knob or switch), and then using a long lighter or match to ignite the gas. Keep your face and hands a safe distance to prevent burns. Always ensure proper ventilation during the ignition process. If the burner doesn’t light after several attempts, refer to the troubleshooting section of your manual or contact a qualified service technician. Never attempt to force the ignition process, as this could cause gas leaks or damage the appliance. Regularly inspect the burner and its components for any signs of damage or blockages to ensure safe and efficient operation.

Troubleshooting Common Frigidaire Oven Issues

This section addresses common problems like uneven heating, temperature discrepancies (too hot or cold), and other issues, providing solutions and guidance for maintaining optimal oven performance.

Uneven Oven Temperatures

Uneven heating in your Frigidaire oven can be frustrating, leading to inconsistently baked goods or unevenly cooked meals. Several factors can contribute to this problem. First, ensure your oven racks are properly positioned. Overloading the oven can also hinder proper heat circulation, causing temperature variations. Check for any obstructions near the heating elements, as these can block airflow and lead to uneven heat distribution. If your oven has multiple heating elements, make sure they are all functioning correctly; A malfunctioning element could be the source of the uneven temperature. Consider cleaning the oven thoroughly. Built-up food residue can interfere with heat circulation and cause uneven baking. If you’ve checked these aspects and the problem persists, consult your Frigidaire oven manual for further troubleshooting steps or contact customer support for assistance. They may be able to diagnose a more serious issue requiring professional repair.

Oven Too Hot or Cold

Experiencing an oven that’s consistently too hot or too cold significantly impacts baking and cooking results. First, verify the oven’s temperature setting matches the recipe’s requirements. Incorrectly setting the temperature is a common cause of inaccurate cooking temperatures. Next, check the oven’s thermostat for proper calibration. A faulty thermostat may prevent the oven from reaching or maintaining the set temperature. Consider the oven’s location and any external factors that might affect its temperature. Poor ventilation or proximity to heat sources can impact performance. Inspect the oven door seal for any damage or gaps; a compromised seal allows heat to escape, resulting in lower-than-expected internal temperatures. If the oven consistently runs too hot or cold despite these checks, consult your Frigidaire oven manual for troubleshooting or contact a qualified technician. A malfunctioning heating element or other internal component may require professional repair or replacement to resolve the issue.

Other Troubleshooting Tips

Beyond temperature issues, several other problems might arise with your Frigidaire oven. If your oven isn’t heating at all, check the circuit breaker or fuse box to ensure power is supplied to the appliance. A tripped breaker or blown fuse is a simple yet often overlooked cause of oven failure. Examine the oven’s interior for any obstructions that might block heat circulation. Accumulated debris or improperly placed cookware can impede heating efficiency. If you notice unusual noises, such as clicking, buzzing, or grinding, consult your Frigidaire oven manual for guidance. These sounds often indicate a mechanical problem that may require professional attention. Regularly inspect the oven’s heating elements for any signs of damage or wear. Burnt-out or damaged elements need replacement to restore proper oven function. Remember to always disconnect the power supply before performing any internal inspections or repairs to prevent electric shock. If problems persist despite these steps, contacting a qualified service technician is advised to accurately diagnose and resolve the issue effectively.

Safety Precautions and Maintenance

Prioritize safety when using your Frigidaire oven; always follow the instructions in your manual. Regular cleaning and careful handling of hot surfaces are crucial for safe and efficient operation. Proper maintenance extends the lifespan of your appliance.

Important Safety Instructions

Before using your Frigidaire oven, carefully read the safety instructions provided in your user manual. Never operate the oven if it’s damaged. Always allow sufficient space around the oven for ventilation to prevent overheating and potential fire hazards. Ensure proper electrical grounding is established before plugging in the oven. Use caution when opening the oven door, as the door and interior surfaces can reach extremely high temperatures during operation. Never leave the oven unattended while in use, especially during self-cleaning cycles. Keep children and pets away from the oven to prevent accidental burns or injury. Always use oven mitts or pot holders when handling hot dishes or cookware. Avoid placing flammable materials near the oven. In case of a malfunction, immediately turn off the oven and unplug it from the power source. Contact a qualified technician for repairs or maintenance. Regularly inspect the oven’s power cord for any signs of damage or wear and tear. Replace immediately if needed. Observe all warnings and safety precautions detailed in your appliance’s manual for safe and trouble-free operation.

Cleaning and Care

Regular cleaning is crucial for maintaining your Frigidaire oven’s efficiency and longevity. After each use, allow the oven to cool completely before cleaning. Wipe up spills and splatters immediately to prevent them from baking on. For light cleaning, use a damp cloth or sponge with mild detergent. Avoid abrasive cleaners or scouring pads, as they can scratch the oven’s interior surfaces. For tougher baked-on food, consider using a non-abrasive oven cleaner, following the manufacturer’s instructions carefully. Always ensure the oven is completely cool before using any cleaning agents. Periodically clean the oven door glass, both inside and out, using a glass cleaner. The oven racks can be cleaned with warm soapy water or in a dishwasher (check your manual for rack cleaning instructions). Remember to consult your oven’s user manual for specific cleaning instructions and recommendations for your model. Proper cleaning practices will help preserve your oven’s appearance and functionality, ensuring years of reliable service.

windmill ac manual

Windmill AC Manual⁚ A Comprehensive Guide

This manual provides comprehensive guidance on installing, operating, and maintaining your Windmill AC unit․ Find step-by-step installation instructions, troubleshooting tips, and details on maximizing energy efficiency and eco-friendly features․ Learn about app integration and warranty information for complete support․

Installation Guide⁚ A Step-by-Step Process

This section details the straightforward installation of your Windmill AC unit․ Begin by carefully unboxing the unit and inspecting all components for any damage․ Ensure your window is properly prepared; for double-hung windows, ensure they slide smoothly․ Next, carefully lift the AC into the window frame with assistance, ensuring the bottom bar is properly positioned․ Secure the unit firmly․ The pre-assembled installation kit simplifies the process․ Refer to the diagrams in the accompanying documentation for visual guidance․ Connect the electrical wiring, observing all safety precautions, including disconnecting power before making any connections․ If your window requires additional support brackets, install them before proceeding․ Test the electrical connections before fully operating the unit․ Always refer to the safety instructions within this manual for important warnings and precautions before beginning the installation process․ If you encounter any difficulties during the installation, consult the troubleshooting section or contact Windmill support at windmillair․com/support for assistance․ Once correctly installed, your Windmill AC is ready for operation․

Unboxing and Initial Inspection

Carefully unpack your Windmill AC unit, taking note of all included components․ The pre-assembled installation kit simplifies the setup, but it’s crucial to verify its completeness against the packing list․ Check for any visible damage to the unit itself, including dents, scratches, or cracks in the casing․ Examine the power cord for any signs of fraying or damage․ Inspect the window mounting brackets for any bending or imperfections․ A thorough visual inspection is crucial before proceeding to installation․ Ensure all parts are present and undamaged; if any issues are found, contact Windmill support immediately before attempting installation․ Detailed illustrations are included in this manual to help you identify each component․ Do not proceed with installation if any damage is observed․ Note the model number and serial number located on the unit’s identification plate – these will be needed for warranty purposes․ Take photos of the unboxing process and any potential damage․ This documentation will be helpful if you need to contact customer service for assistance․ Record the serial number and model number in a safe place for future reference․

Window Preparation and Mounting

Before mounting, ensure your window is clean and free of obstructions․ The Windmill AC is designed for double-hung windows that slide up and down; however, some installations may require additional support brackets․ Carefully measure your window to confirm compatibility with the unit’s dimensions․ For optimal performance and to prevent leaks, ensure a snug fit between the unit and the window frame․ The installation kit includes all necessary hardware; refer to the diagrams for correct placement․ Gently lift the AC unit into the window frame with assistance, ensuring it’s positioned level and secure․ Attach the mounting brackets according to the instructions; these brackets usually extend beyond the window frame to provide extra support and stability․ Tighten all screws securely to prevent movement or vibrations during operation․ If you encounter difficulties fitting the unit, review the troubleshooting section or contact customer support for assistance․ Do not force the installation; this can damage both the unit and the window․ Once mounted, test the unit’s stability by gently rocking it to ensure it’s securely fastened․ Improper installation can lead to leaks, reduced efficiency, or even damage to the unit․

Electrical Connections and Safety Precautions

Before making any electrical connections, ensure the power is completely switched off at the breaker box․ This crucial safety step prevents electrical shocks and potential damage to the unit․ Carefully inspect the power cord for any signs of damage; if frayed or damaged, do not use the unit and contact customer support for a replacement․ The Windmill AC’s power plug includes TEST and RESET buttons; periodically test these functions․ Failure of the TEST button to trip or the RESET button to remain engaged indicates a potential electrical fault; discontinue use immediately and contact Windmill Air at windmillair․com/support․ Connect the power cord securely to a properly grounded three-prong outlet; never use an adapter to circumvent this essential safety measure․ Incorrect grounding significantly increases the risk of electrical shock․ Avoid overloading the circuit; ensure that the outlet is dedicated to the AC unit and not sharing power with high-wattage appliances․ After connecting the power cord, switch on the power at the breaker box and check the unit’s operation․ If the unit doesn’t power on, double-check all connections and refer to the troubleshooting section or contact support for further guidance․ Never attempt to repair electrical components yourself; unauthorized repairs void the warranty․ Always prioritize safety; if unsure about any aspect of the electrical connections, consult a qualified electrician․

Troubleshooting Installation Issues

If your Windmill AC unit is not functioning correctly after installation, systematically check several potential issues․ First, verify that the power cord is securely connected to both the unit and a properly grounded three-prong outlet․ Ensure the power is switched on at the breaker box․ If the unit still fails to operate, check the circuit breaker; it may have tripped due to an overload or short circuit․ Examine the window installation; make sure the unit is firmly seated within the window frame, preventing air leaks․ Loose or improperly installed brackets can cause vibrations and malfunctions․ If the window is not properly sealed, air will escape, resulting in inefficient cooling and potentially increased energy consumption․ Check for any obstructions that might be blocking the airflow to and from the unit, both inside and outside․ Confirm that the filter is correctly installed and not obstructing the airflow․ A clogged filter significantly reduces cooling efficiency․ Inspect the power cord for any signs of damage; a frayed or damaged cord needs immediate replacement․ If you encounter persistent operational issues or are unsure about any aspect of the troubleshooting process, refer to the online support resources at windmillair․com/support or contact customer service for assistance․ Remember that attempting unauthorized repairs can void the warranty․ Always prioritize safety; if you are not comfortable troubleshooting electrical issues, consult a qualified electrician․

Owners Manual⁚ Operation and Maintenance

This section details the operation and ongoing maintenance of your Windmill AC unit to ensure optimal performance and longevity․ Familiarize yourself with the control panel functions, including the thermostat, fan speed settings, and any additional features such as eco-mode or scheduling options․ Regularly inspect and clean the air filter; a dirty filter restricts airflow, reduces cooling efficiency, and can lead to premature wear․ The frequency of filter cleaning depends on usage and environmental conditions but should be performed at least every 3 months, or more often if needed․ The color of the degree symbol on the display panel changes to red to signal the need for filter cleaning․ To reset the filter indicator light, press and hold the filter button for five seconds until it beeps․ The Windmill AC unit is designed for ease of use, with intuitive controls and clear operational indicators․ The app provides additional control options and convenient remote management features․ Pay attention to any unusual sounds or vibrations during operation․ Unusual noises could indicate a problem that requires professional attention․ Avoid overloading the unit or blocking its ventilation, as this will negatively impact its performance․ Always refer to the safety guidelines before operation, and consult the troubleshooting section for assistance with any operational problems․ Proper maintenance ensures that your Windmill AC provides years of reliable and efficient cooling․

Understanding Control Panel Functions

The Windmill AC control panel provides intuitive access to various operational settings․ The primary function is the thermostat, allowing you to set your desired temperature․ Use the up and down arrows to adjust the temperature setting, displayed digitally on the panel․ The fan speed can be adjusted to your preference, typically offering options like low, medium, high, and auto․ Auto mode automatically adjusts fan speed based on the set temperature and the room’s current temperature․ Many models include a mode selection button, offering choices such as cool, fan only, and potentially additional modes like eco-mode or sleep mode․ Eco-mode optimizes energy consumption without compromising cooling performance, while sleep mode gradually increases the temperature during the night for enhanced comfort and energy savings․ A timer function might be available, enabling you to schedule the unit to turn on or off at specific times․ Some models incorporate a filter indicator light, changing color to alert you when it’s time to clean or replace the filter․ The control panel may also include buttons for accessing additional settings or features, such as those controlled via the Windmill Air app․ Familiarize yourself with all the buttons and their functions to make the most of your Windmill AC’s capabilities․ Remember to consult the troubleshooting section if you encounter any difficulties understanding or using the control panel functions․

Setting Schedules and Preferences

Maximize your Windmill AC’s efficiency and comfort by utilizing its scheduling and preference features․ Many models offer programmable timers, allowing you to set specific on and off times to coincide with your daily routine․ This ensures your home is cool when you need it and avoids unnecessary energy consumption when you’re away․ The Windmill Air app often enhances this functionality, providing a user-friendly interface for creating and managing complex schedules․ Through the app, you might be able to create different schedules for weekdays and weekends, or even tailor schedules based on specific events or occasions․ Beyond scheduling, explore other preferences such as fan speed settings․ You can select a preferred fan speed, or choose auto mode which automatically adjusts the fan speed based on the temperature difference between the set point and the room’s current temperature․ Some models allow you to customize additional preferences like sleep mode, gradually increasing the temperature during the night for enhanced comfort and energy savings․ Understanding and utilizing these scheduling and preference options will optimize your AC’s performance while contributing to lower energy bills and a more comfortable living environment․ Remember to consult the Windmill Air app or your unit’s manual for specific instructions on accessing and setting these preferences․

Filter Maintenance and Replacement

Maintaining clean air filters is crucial for optimal performance and longevity of your Windmill AC unit․ Regular cleaning and timely replacement significantly impact the efficiency of your unit and the quality of the air you breathe․ Your Windmill AC may use a reusable filter, often indicated by a change in color on the display panel from white to red․ When this occurs, carefully remove the filter, rinse it with lukewarm water, and allow it to completely air dry before reinstalling․ Avoid using harsh detergents or abrasive cleaners, which can damage the filter material․ For activated carbon filters, replacement is usually recommended every three months, depending on usage․ These filters trap microscopic contaminants, and while they might appear clean, their effectiveness degrades over time․ Check your Windmill AC manual or the Windmill Air app for specific filter replacement instructions․ Replacing a clogged filter will improve air flow, reduce strain on your unit’s motor, and ensure your AC continues to cool efficiently․ Neglecting filter maintenance can lead to reduced cooling capacity, increased energy consumption, and potential damage to the unit’s internal components․ By adhering to the recommended filter maintenance schedule, you will not only prolong the lifespan of your Windmill AC but also improve indoor air quality for better health and well-being․

Troubleshooting Operational Problems

Should your Windmill AC encounter operational issues, this section provides guidance on common problems and their solutions․ If your unit fails to power on, first check the power cord connection and ensure the circuit breaker hasn’t tripped․ Refer to the electrical connection section of this manual for detailed instructions․ If the unit powers on but doesn’t cool effectively, inspect the air filter for clogs; a dirty filter restricts airflow, reducing cooling performance․ Clean or replace the filter as described in the filter maintenance section․ Unusual noises emanating from the unit may indicate a loose component or obstruction․ Consult the installation guide to ensure all parts are securely fastened․ If the unit is not cooling adequately even after filter checks, examine the window installation to ensure there are no gaps allowing warm air to enter․ Refer to the installation guide for proper window sealing techniques․ If the problem persists despite these checks, the TEST and RESET buttons on the plug case can help diagnose electrical faults․ Press TEST, then RESET; if these buttons don’t function correctly, immediately cease operation and contact Windmill support at windmillair․com/support․ The Windmill Air app may also provide diagnostic information and troubleshooting advice․ Always refer to the safety precautions section before attempting any repairs․ For complex issues, contacting Windmill’s customer support is recommended to avoid potential damage or injury․ They can provide expert assistance and guide you through advanced troubleshooting steps․

Warranty Information and Support

Your Windmill AC is covered by a limited one-year warranty against manufacturing defects․ This warranty covers the repair or replacement of defective parts during the warranty period․ To initiate a warranty claim, contact Windmill customer support at windmillair․com/support; You will need your proof of purchase and the model number of your unit․ The warranty does not cover damage caused by misuse, neglect, or unauthorized repairs․ It also does not cover normal wear and tear, such as filter replacement․ For detailed terms and conditions of the warranty, please refer to the terms of sale document available at https://windmillair․com/pages/terms-of-sale․ Optional extended warranty coverage is available through our partner, Clyde, at checkout․ For assistance beyond the warranty period, Windmill offers paid maintenance and repair services․ Contact customer support for pricing and scheduling information․ Windmill’s customer support team is available to answer your questions and provide technical assistance․ Contact them via email, phone, or the online support portal․ They can help with troubleshooting common issues, provide guidance on maintenance procedures, and assist with warranty claims․ Remember to keep your proof of purchase and manual readily accessible for quick reference․ Proactive maintenance, as detailed in the owner’s manual, can help prevent issues and prolong the lifespan of your Windmill AC unit․

App Integration and Remote Control

Enhance your Windmill AC experience with seamless app integration and remote control capabilities․ Download the Windmill Air app, available for iOS and Android devices, to effortlessly manage your unit from anywhere with an internet connection․ The user-friendly interface allows you to power your AC on or off remotely, adjust the temperature settings, and customize your cooling preferences, all at your fingertips․ Imagine arriving home to a comfortably cool space by pre-setting your AC to turn on 10 minutes before you arrive, eliminating the need to wait for it to cool down․ Or, effortlessly shut off your AC remotely if you forget to do so before leaving the house, conserving energy and saving on your utility bills; The app also provides real-time monitoring of your AC’s operational status, allowing you to track energy consumption and identify any potential issues promptly․ Furthermore, the Windmill Air app facilitates advanced scheduling options․ Program your AC to automatically turn on and off at specific times, aligning perfectly with your daily routine and maximizing energy efficiency․ This smart scheduling feature allows for customized settings based on your lifestyle, ensuring optimal comfort and minimizing energy waste․ The intuitive app interface makes these functionalities easily accessible to all users, regardless of their technical expertise․ Experience the convenience and control that the Windmill Air app brings to your cooling experience․

Energy Efficiency and Eco-Friendly Features

The Windmill AC is engineered with a strong focus on energy efficiency and environmentally conscious design․ Its advanced cooling technology ensures optimal performance while minimizing energy consumption․ By utilizing eco-friendly refrigerants and employing innovative energy-saving modes, the Windmill AC significantly reduces its carbon footprint compared to traditional air conditioning units․ The unit’s quiet operation contributes to a peaceful environment, reducing noise pollution․ The Department of Energy recommends setting your thermostat higher than normal when away and at 78 degrees Fahrenheit when home for optimal energy savings while maintaining comfort․ The Windmill AC’s smart features, accessible through the mobile app, allow for precise temperature control and automated scheduling, further optimizing energy usage․ These features enable users to create personalized cooling schedules based on their daily routines, minimizing energy waste during unoccupied periods․ Regular filter maintenance, as detailed in this manual, is also crucial for maintaining peak efficiency and extending the lifespan of your Windmill AC․ By following these simple maintenance steps, you’ll not only contribute to environmental sustainability but also ensure that your unit continues to operate at its highest level of energy efficiency․ The Windmill AC represents a commitment to both personal comfort and environmental responsibility․